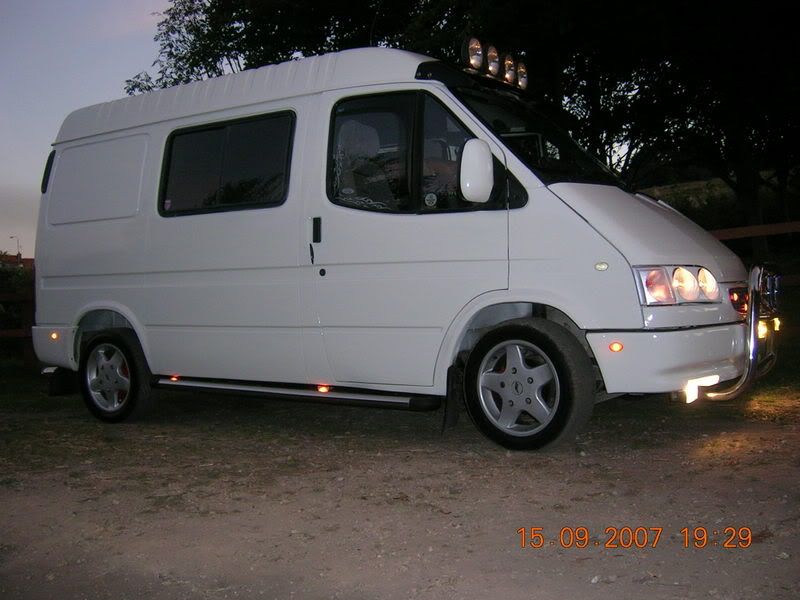
Up until now, we were just throwing some hay bales in the back and making a makeshift pen up, but this was less than ideal, and a hassle to keep removing them, cleaning up etc. Also wanted a more professional, safe, and secure way for them to travel.
So over to me getting a bit bored in the run up to the bank holiday weekend, thought it was about time to make a start on.... something, wasnt quite sure what, and without actually drawing anything down on to paper, off I went to focus to lighten my wallet somewhat.
Firstly we decided that we would like them to enter through the side loading door, and load sideways on, this also would maximise the availible space around the wheel arches for other things.
So for the first night, in went some cross beams.

Hand space is fairly limited inside those upright bulkheady bits, but just enough to get a nice solid nut and bolt in place. The rearmost beam I pop riveted brackets into place, and bolted via the brackets, again a surprisingly strong setup. Both beams support my weight without any horrible bending noises, or tearing of metal

The idea of all this, was for it to be modular and removeable, so if needed the van could be returned to its regular state, and used for tip runs, or indeed further enthusiatic runs to focus
The second day, I spent time building onto the crossbars a basic frame to create the partitions. The biggest blisters were created from all the manual screwing right in the centre of my hand


Also started work on building the ramp, that would hopefully locate into the step on the side loading door. But also fit nicely into the back of the van when not in use.

Day 3, and off to get the plywood. Wanted large sheets, so each partition would have a complete bit, and not look too hotch potch. Unfortunately after buying the 8x4 sheets and getting them outside I realised they werent going to fit in the van. So queue some funny looks as I start cutting them to size right there in the car park, using trolleys laid on their side as workbenches
Finished off the ramp first. When I got back. Surprisingly light, given how bulky it looks. Little bit awkward to move around, but it shouldnt get broken in a hurry. (Bonus points for spotting the white rabbit, 'Where's Wally' stylee)

Next built the frame for the centre partition, the vague plan here was to bolt it in at 4 points in the van, using sliding gate bolts. This would hopefully also allow it to pivot to assist loading the first horse without it getting caught on the side door. Sounded ambitious to me, but seemed to work quite well. Riveted brackets onto the metal cross beam in the roof to move the position of the required holes about 2 inches further forward. Due to metal roof beam not being in the place I required it
On goes the plywood, and its beginning to look like something. I purchased a jigsaw to assist at this stage, and it gives a surprisingly tidy and accurate finish if measured out properly, just tidied up the edges with a bit of sand paper.

The front bulkhead, the only permanent fixture, just before applying the plywood.

The rearmost partition is secured in three points, using long roofing bolts and wingnuts. This allows it to be removed quickly and without tools. The brackets remain a permanent fixture being riveted to the van, but shouldnt cause much of an obstruction.


Finally, a breast bar to stop them headbutting the offside wall panels, or getting tangled up in the flange type metal near the walls. Again the breast bar is removable, secured with M8 bolts and wingnuts. You can also see the pivoting action of the centre partition here. Incredibly solid whilst all four bolts are in place, and doesnt rattle on the move, which is excellent news

So, last bits of plywood finished off as neatly as possible, with probably far too many panel pins. Maybe I just like my hammer
And there you have it.

Washed the green slime off the roof as well, just to make a bit of an effort to detach the van from the pikey image

Bedded up and ready to go, the plan will eventually be, to cut rubber matting in two bits, to fit in place in the stalls, gives more grip and support for the little ones, as well as being easier for us to remove and clean than the straw.

Trying to coax the nervous buggers into working out how the ramp works... Got there in the end, it is surprisingly difficult to force these little ones to do anything, the strength and determination to resist is very much in place from an early age.

And finally, the happy customers, loaded and ready to go. You can see here the ramp in its stowed positon, actually doubles up as a full width shelf in the rear, sitting on the wheel arches. Kit can be stored underneath, leaving space for hay bales or bulky items above.

I'm not a hobby DIY'er by any stretch of the imagination, and this is perhaps the first time i've lifted a saw, drill or hammer in anger, since woodworking at school. Really enjoyed it, very satisfying work.
I'm really pleased with the results, the bill minus the tools purchased for the job, was around the £130 mark. I'm sure there will be plenty more in the pipeline to be added. Once you get started with these things, there is always extra bits you want to add.
Now just hope our trusty old transit goes the distance. Thanks for reading!


 1 by 1 the penguins keep stealing my sanity!!