*NOW BOOKED FOR 2024* Transitmania 15 @ Santa Pod 19th to 21st July 2024 *ALL DETAILS HERE*
My (hopefully) quick and (hopefully) cheap conversion.
Moderator: Luke
71 posts
• Page 3 of 5 • 1, 2, 3, 4, 5
Re: My (hopefully) quick and (hopefully) cheap conversion.
![]() by birdie » Sun May 17, 2015 7:53 pm
by birdie » Sun May 17, 2015 7:53 pm
Good work, looks great
mk7 T350 FWD towing van
-

birdie - Transit Aficionado

- Posts: 213
- Joined: Mon Apr 06, 2015 4:34 pm
Re: My (hopefully) quick and (hopefully) cheap conversion.
![]() by d.e.hill » Sun May 24, 2015 11:05 pm
by d.e.hill » Sun May 24, 2015 11:05 pm
Day 10
I finally got out again to progress the van today!
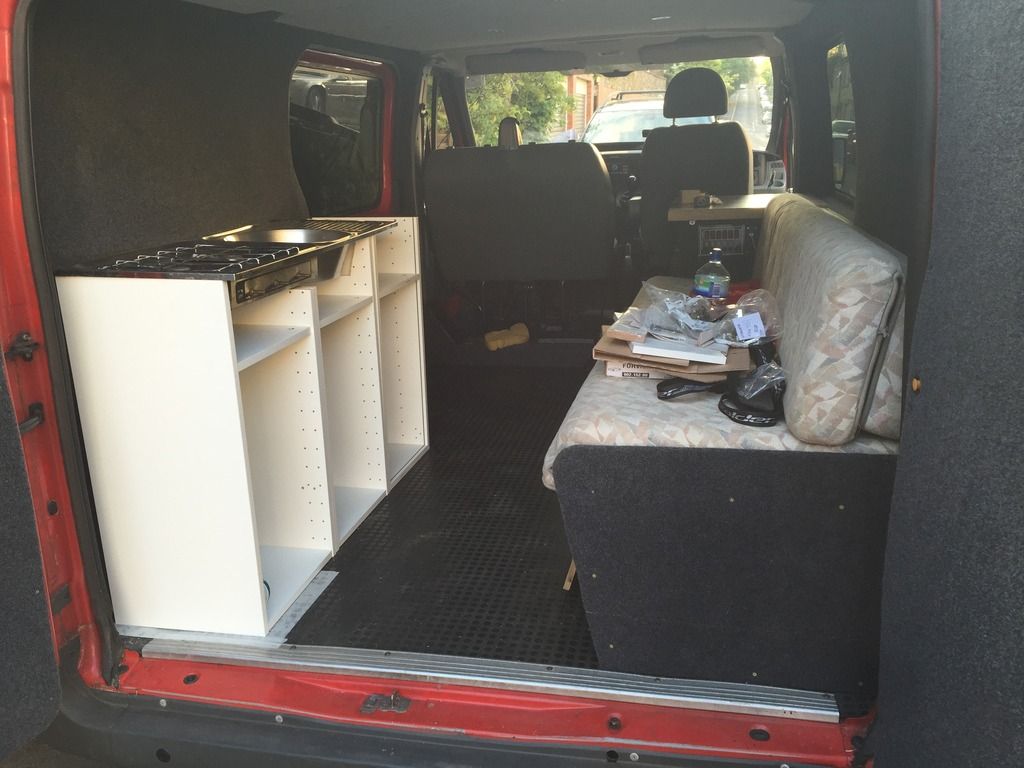
First job was to cut a new plywood end for the sofa, and add a bit of carpet to tidy up the whole affair. While I was at it, I screwed down the countertop on top of the fridge, finishing (pretty much) the right hand side of the van.
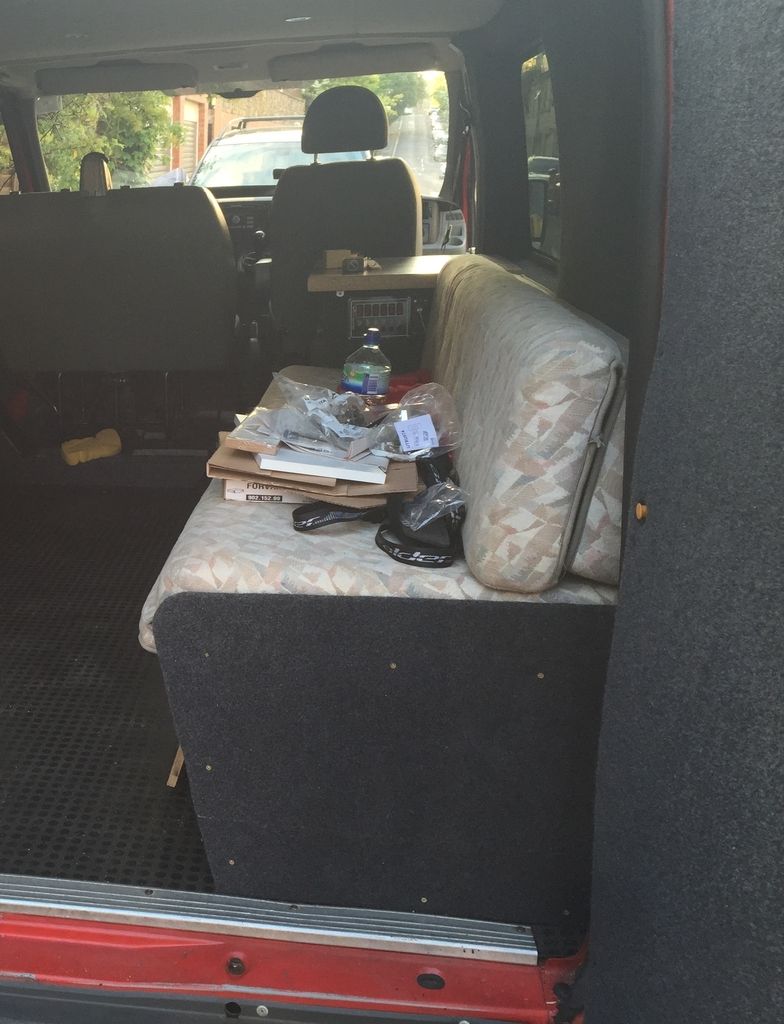
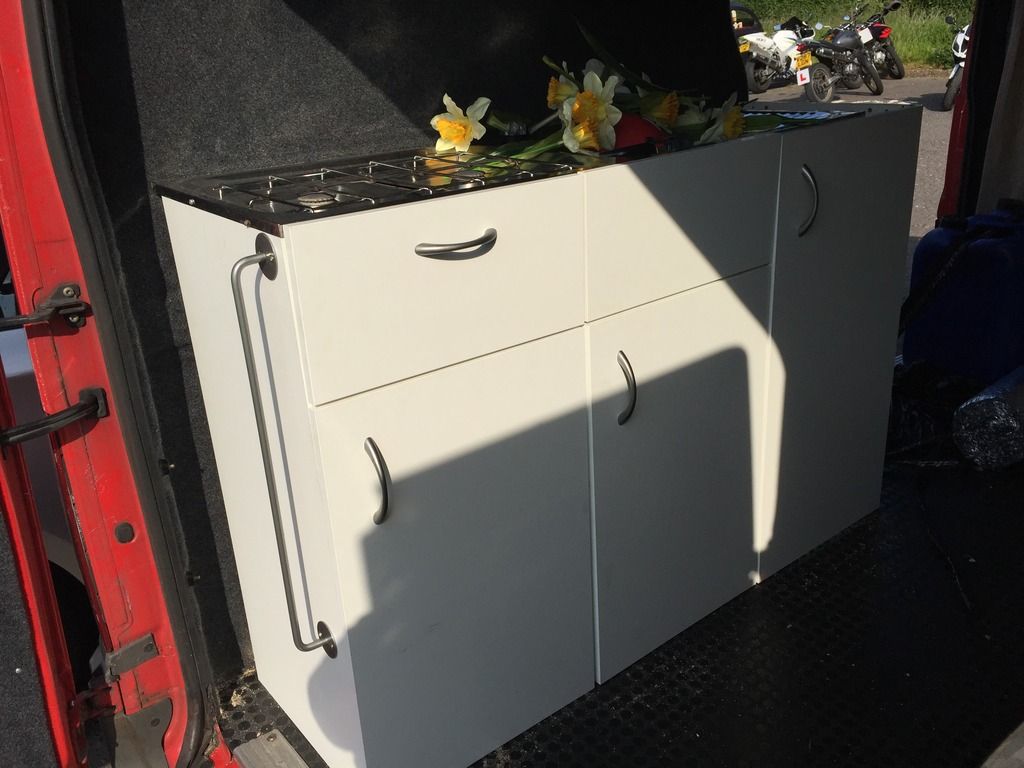
The next job was to look at the kitchen, which will go on the left hand side, behind the door. I got a complete kitchen setup with the campervan interior I bought, but as soon as I started taking it apart I soon decided it wasn't in good enough nick to put in the back of the van! Cue a trip to IKEA for the tried and tested wall cabinet solution. After trying a few styles, I decided 3 thin cupboards (400mm each) would fit well, and the cheapest combination with a drawer and a few extras was just shy of £100. Pretty good really!
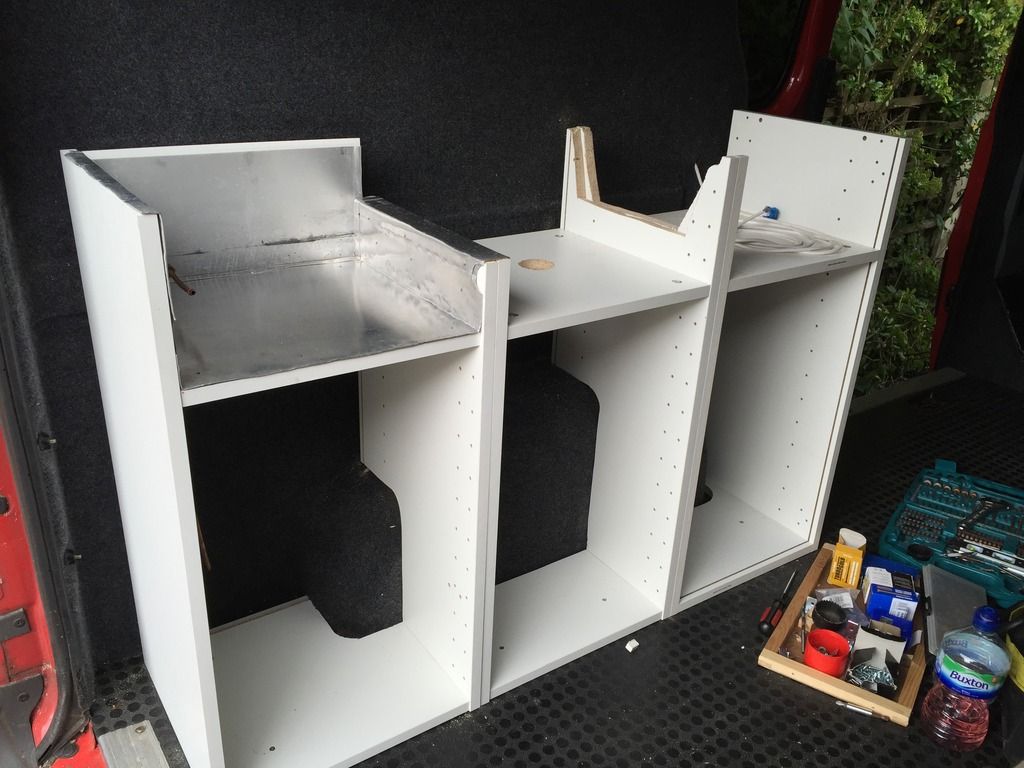
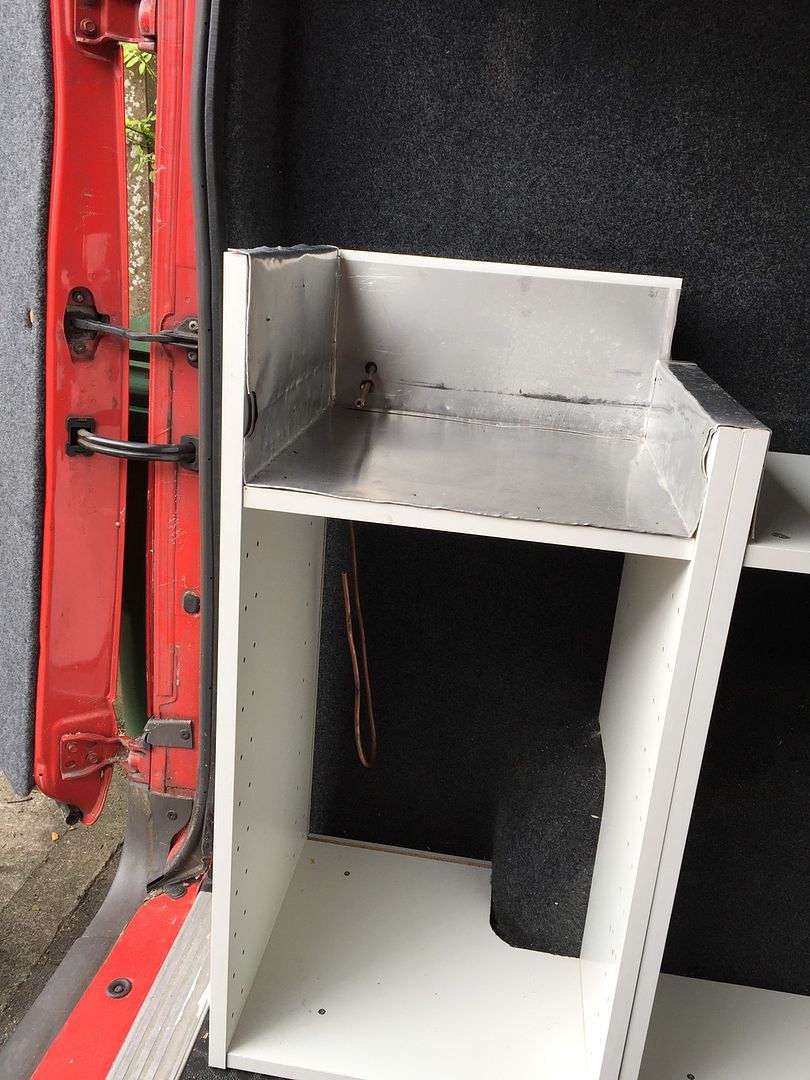
As I planned to add my cooker/sink combo to the top, I needed to amend the units to lower the tops. This meant drilling each side panel with new holes for the tops and assembling. Here's what the first one looked like.
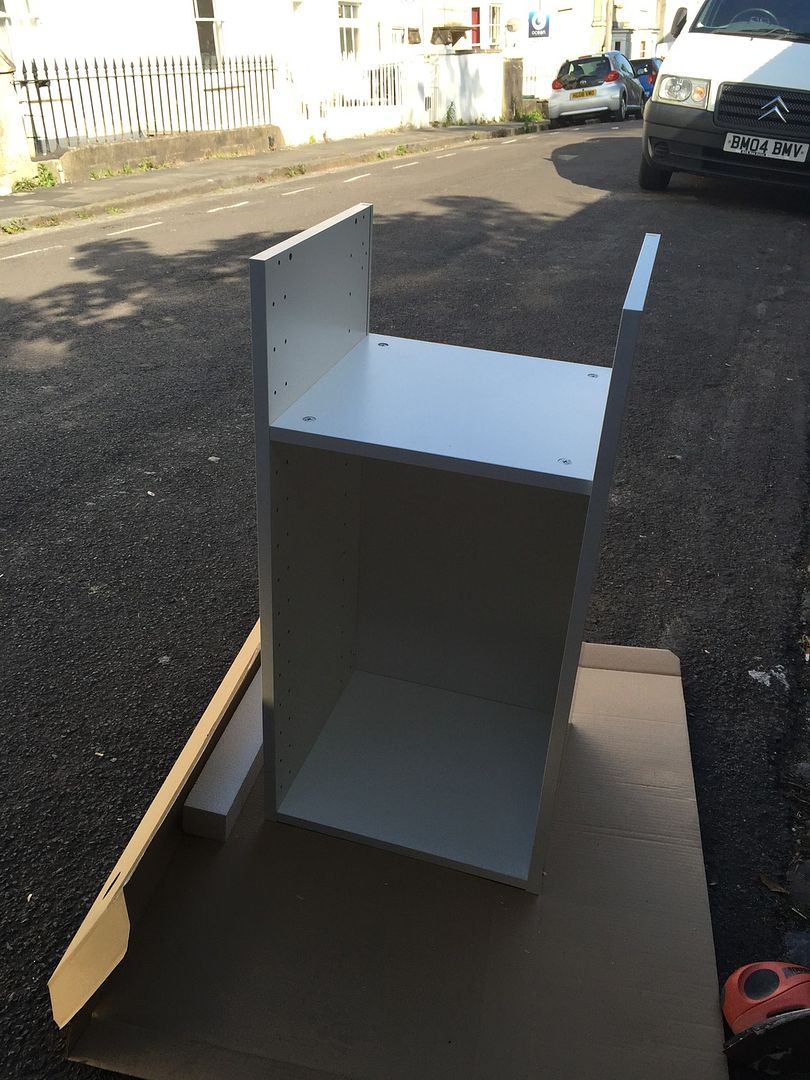
I then offered the unit up to the van, marked it up and cut around the wheel arch.
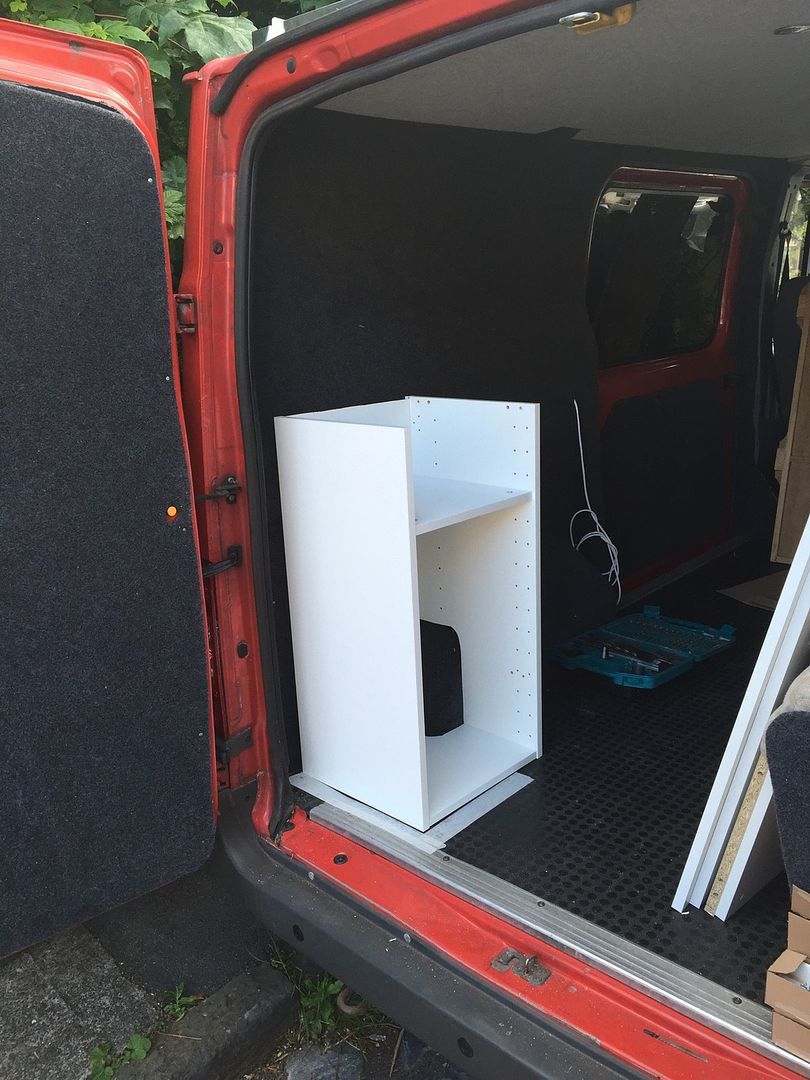
Quite time consuming work (and a pain in the a**e!), but repeating the process produced a second cupboard...

And a third:

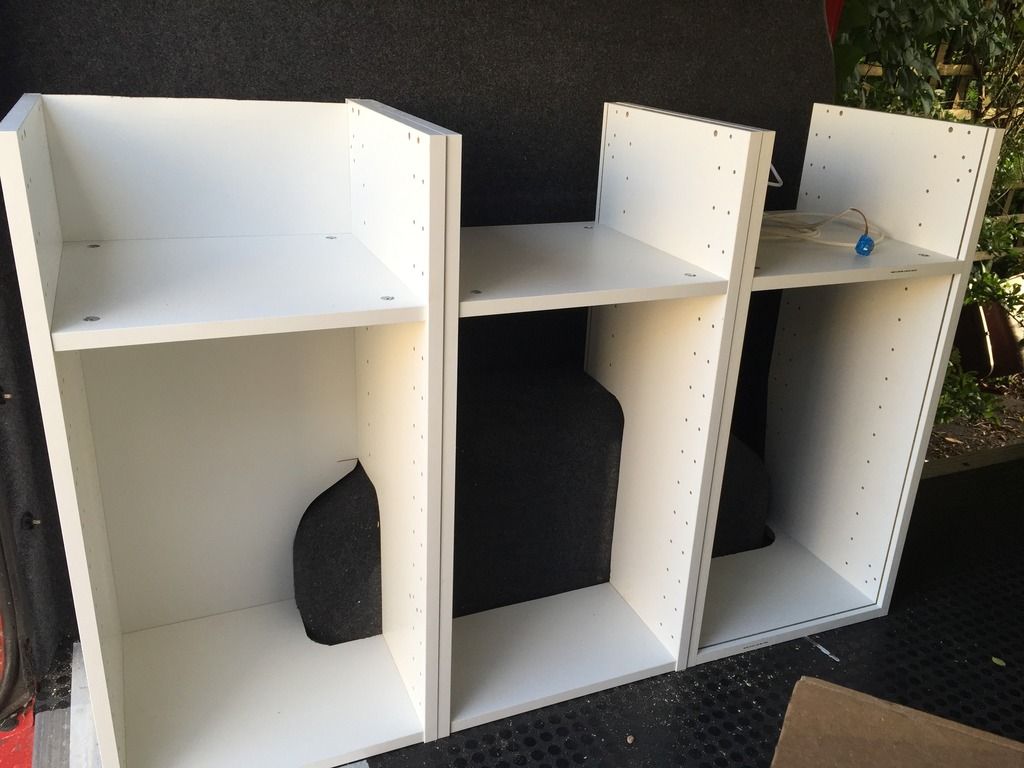
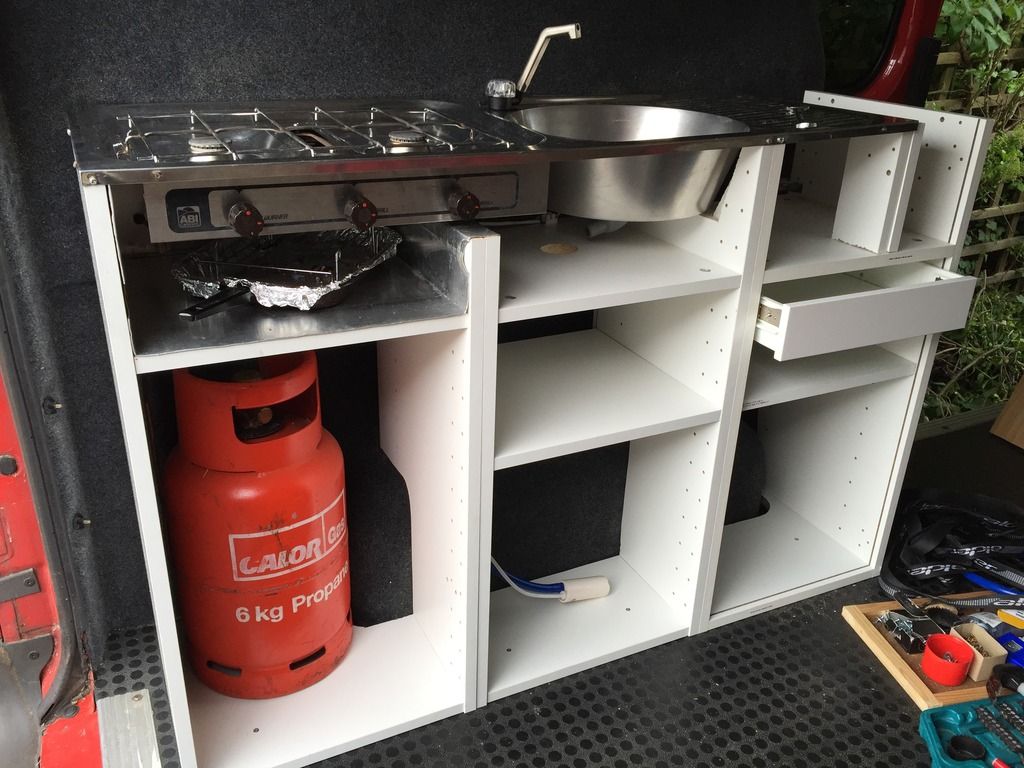
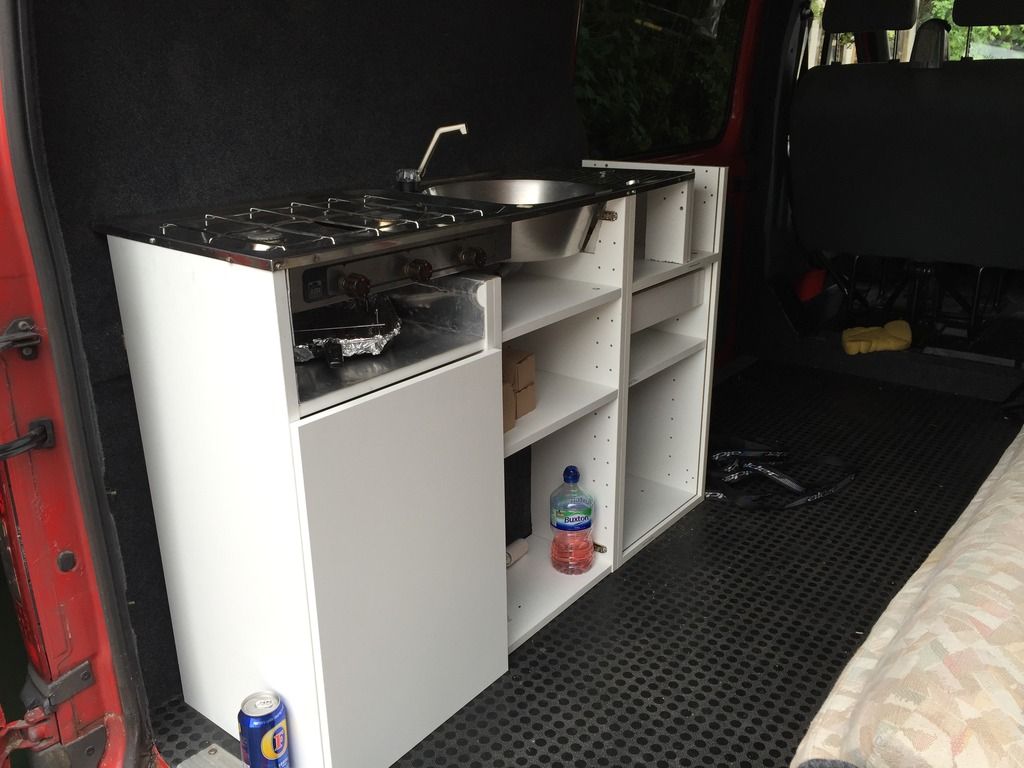
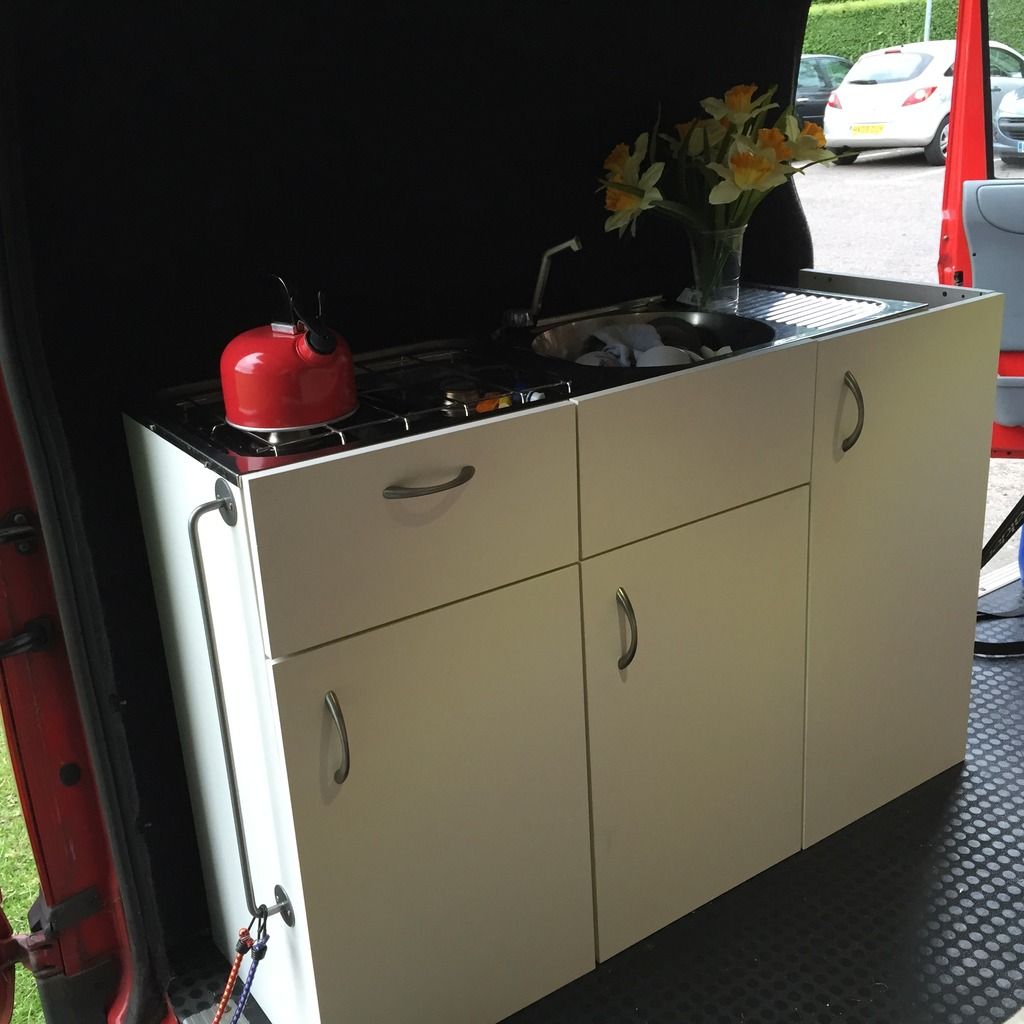
Next job was to clean up the cooker/sink unit which was pretty minging(!) I then offered it up to the top of the units, and cut them in turn to fit. By the end, it wasn't perfect (but I was running out of time), so I'll have to tidy it up tomorrow. Here's how it looked by the end:
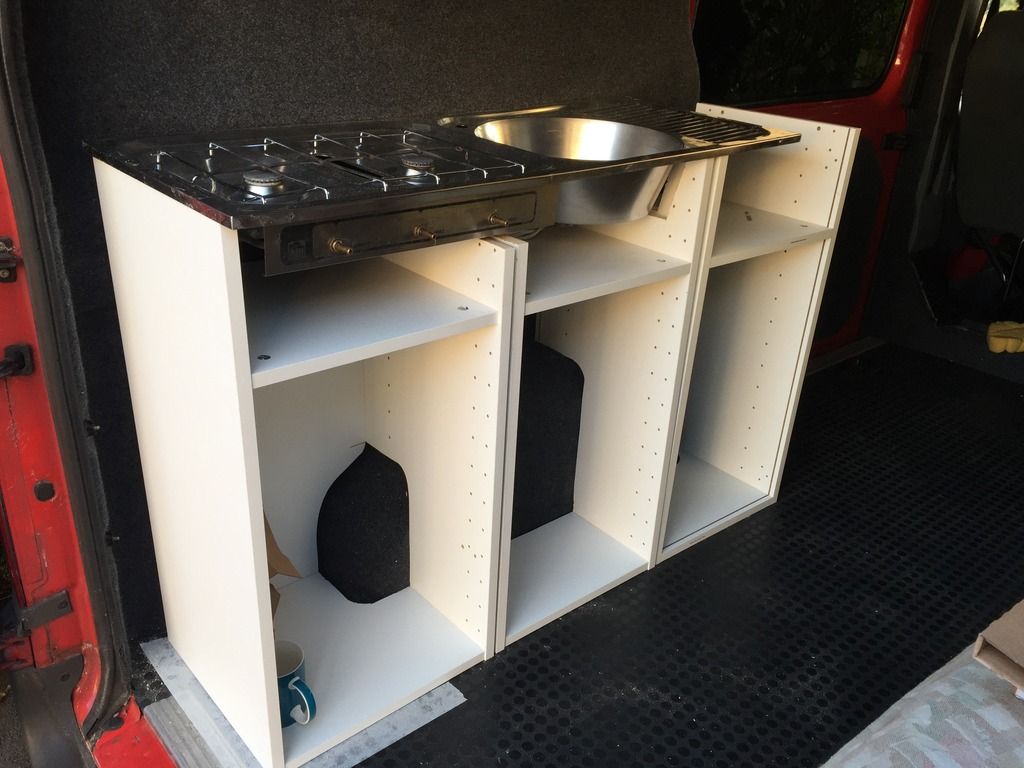
(Spot the deliberate mistake? The third cupboard is fitted backwards. Cock!)
Next jobs will be to finish off the trimming, then fit the cupboards properly and plumb in the sink/cooker. It's taking shape!
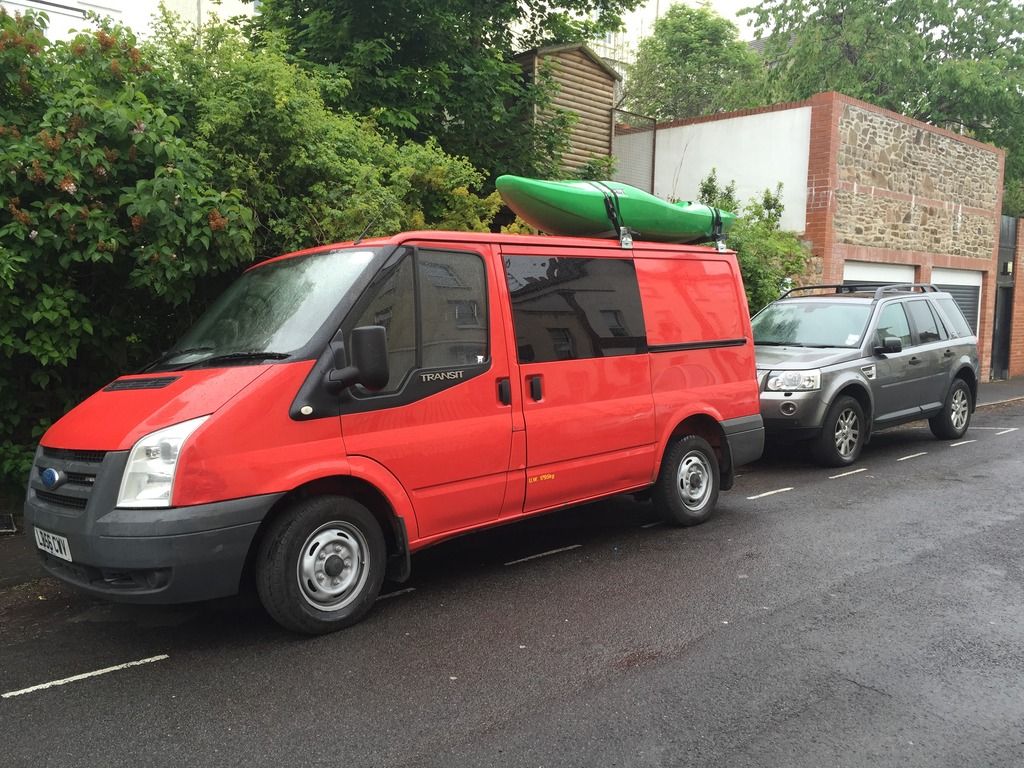
Over the past few days, I've also had the chance to use the van for its other purpose - transporting kayaks! Here's the rig (I wonder if I should stick some Ford wheel trims on it to tart it up??):
I finally got out again to progress the van today!
First job was to cut a new plywood end for the sofa, and add a bit of carpet to tidy up the whole affair. While I was at it, I screwed down the countertop on top of the fridge, finishing (pretty much) the right hand side of the van.

The next job was to look at the kitchen, which will go on the left hand side, behind the door. I got a complete kitchen setup with the campervan interior I bought, but as soon as I started taking it apart I soon decided it wasn't in good enough nick to put in the back of the van! Cue a trip to IKEA for the tried and tested wall cabinet solution. After trying a few styles, I decided 3 thin cupboards (400mm each) would fit well, and the cheapest combination with a drawer and a few extras was just shy of £100. Pretty good really!
As I planned to add my cooker/sink combo to the top, I needed to amend the units to lower the tops. This meant drilling each side panel with new holes for the tops and assembling. Here's what the first one looked like.

I then offered the unit up to the van, marked it up and cut around the wheel arch.

Quite time consuming work (and a pain in the a**e!), but repeating the process produced a second cupboard...

And a third:


Next job was to clean up the cooker/sink unit which was pretty minging(!) I then offered it up to the top of the units, and cut them in turn to fit. By the end, it wasn't perfect (but I was running out of time), so I'll have to tidy it up tomorrow. Here's how it looked by the end:

(Spot the deliberate mistake? The third cupboard is fitted backwards. Cock!)

Next jobs will be to finish off the trimming, then fit the cupboards properly and plumb in the sink/cooker. It's taking shape!
Over the past few days, I've also had the chance to use the van for its other purpose - transporting kayaks! Here's the rig (I wonder if I should stick some Ford wheel trims on it to tart it up??):

- d.e.hill
- Transit Addict

- Posts: 97
- Joined: Mon Mar 30, 2015 10:54 pm
Re: My (hopefully) quick and (hopefully) cheap conversion.
![]() by jr71 » Sun May 24, 2015 11:14 pm
by jr71 » Sun May 24, 2015 11:14 pm
Looking well tidy m8, keep up the good work.
57 plate transit connect
V reg mk5 transit (gone for restoration to Durham)
56 plate mk7
V reg mk5 transit (gone for restoration to Durham)
56 plate mk7
-

jr71 - Transit Aficionado
- Posts: 293
- Joined: Thu Jun 14, 2012 10:05 pm
- Location: Anglesey
Re: My (hopefully) quick and (hopefully) cheap conversion.
![]() by Ventura » Mon May 25, 2015 1:05 pm
by Ventura » Mon May 25, 2015 1:05 pm
Nice one d.e.hill!!
I great to see how your DIY project progresses.
Keep on posting!
V.
I great to see how your DIY project progresses.
Keep on posting!
V.
-

Ventura - Transit Fan

- Posts: 12
- Joined: Sat Apr 25, 2015 12:37 pm
Re: My (hopefully) quick and (hopefully) cheap conversion.
![]() by d.e.hill » Tue May 26, 2015 8:23 am
by d.e.hill » Tue May 26, 2015 8:23 am
God, fitting this kitchen is taking a long time! It took all of...
Day 11
And it's not even finished!
First job was to properly fit the units (i.e. screw them down and together), then beat an aluminium heatshield to fit the far left cupboard for the grill (under the hob). The heatshield was nailed in to the unit with panel pins, and the gas supply routed in through a rubber grommet.
Next job was to sort out the plumbing. This is a simple waste pipe and supply pipe, fed from below the sink with a submersible pump. Wiring was easy enough into the already installed cable.
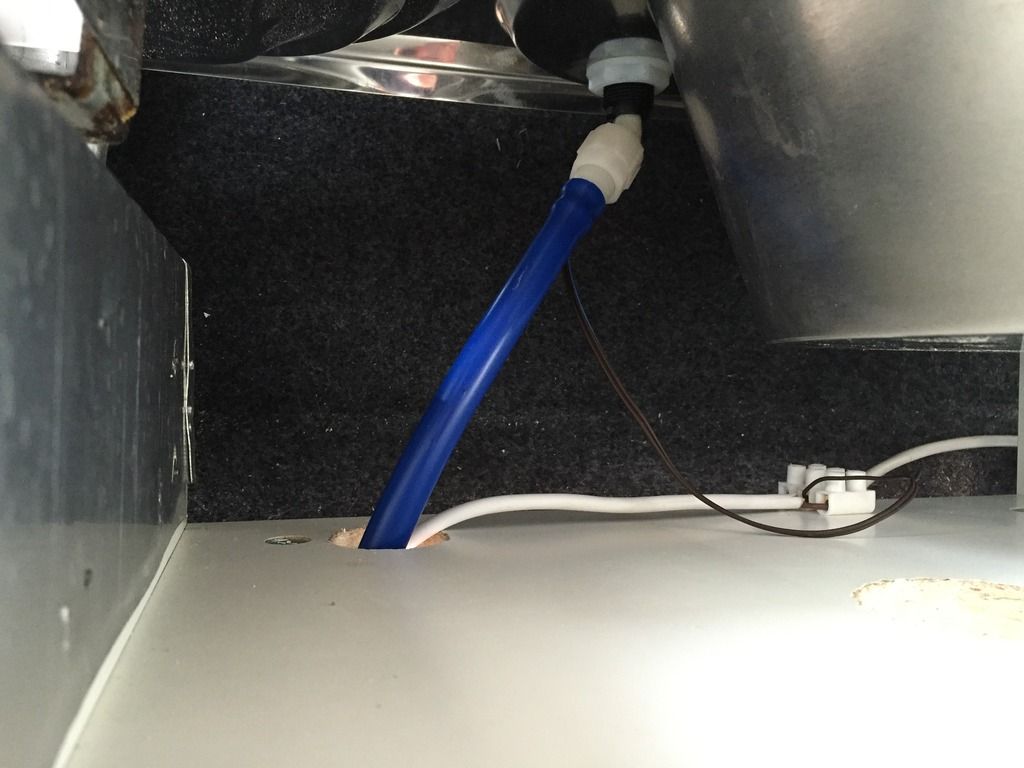
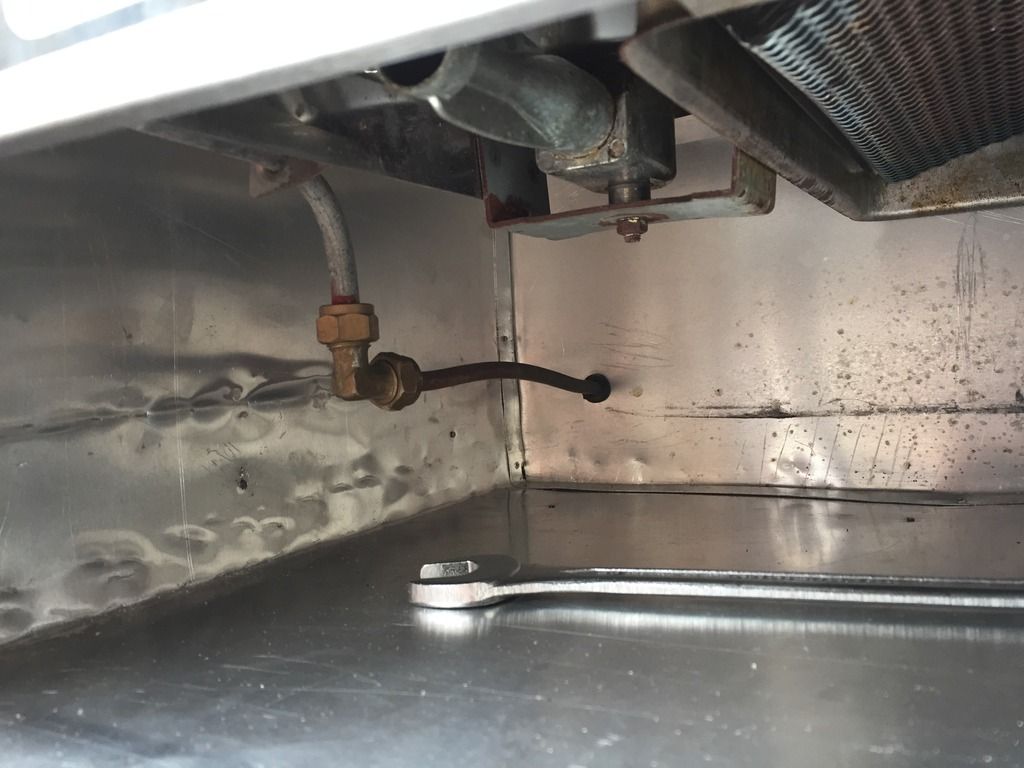
Then I screwed down the hub/sink unit, checked it was level and properly connected up the gas. It's a compression fitting, so remembering from a course I did many years ago, one complete revolution past finger tight should do it (I'll leak test later!).
I then installed some shelving and a drawer (for cutlery) under the far right cupboard.
Final job was to have a look at the cabinet doors. Now the system IKEA use makes it mega easy to install the cabinet doors, unless to monkey around with the carcasses too much!!! Unfortunately the middle door didn't fit, as the sink got in the way of the hinge and the far right door didn't fit as I'd installed the cupboard backwards. I'll just have to make them fit next time!
Day 11
And it's not even finished!
First job was to properly fit the units (i.e. screw them down and together), then beat an aluminium heatshield to fit the far left cupboard for the grill (under the hob). The heatshield was nailed in to the unit with panel pins, and the gas supply routed in through a rubber grommet.


Next job was to sort out the plumbing. This is a simple waste pipe and supply pipe, fed from below the sink with a submersible pump. Wiring was easy enough into the already installed cable.

Then I screwed down the hub/sink unit, checked it was level and properly connected up the gas. It's a compression fitting, so remembering from a course I did many years ago, one complete revolution past finger tight should do it (I'll leak test later!).

I then installed some shelving and a drawer (for cutlery) under the far right cupboard.

Final job was to have a look at the cabinet doors. Now the system IKEA use makes it mega easy to install the cabinet doors, unless to monkey around with the carcasses too much!!! Unfortunately the middle door didn't fit, as the sink got in the way of the hinge and the far right door didn't fit as I'd installed the cupboard backwards.

- d.e.hill
- Transit Addict
- Posts: 97
- Joined: Mon Mar 30, 2015 10:54 pm
Re: My (hopefully) quick and (hopefully) cheap conversion.
![]() by ake » Wed May 27, 2015 8:48 pm
by ake » Wed May 27, 2015 8:48 pm
That gas bottle needs to be strapped in, and it needs a vent straight down through the floor in case it leaks
Ford Transit Custom 280S Trend 105ps
Does this train stop on Merseyside?
Does this train stop on Merseyside?
- ake
- Site Moderator
- Posts: 41833
- Joined: Wed Aug 06, 2008 8:19 pm
- Location: The fair city o' Perth
Re: My (hopefully) quick and (hopefully) cheap conversion.
![]() by mrrcarney » Thu May 28, 2015 3:23 pm
by mrrcarney » Thu May 28, 2015 3:23 pm
Gas bottle needs to be in a sealed box with a drop out hole !!
- mrrcarney
- Transit Aficionado
- Posts: 125
- Joined: Thu Dec 18, 2014 10:15 pm
Re: My (hopefully) quick and (hopefully) cheap conversion.
![]() by paulrichardson » Mon Jun 08, 2015 6:08 pm
by paulrichardson » Mon Jun 08, 2015 6:08 pm
d.e.hill wrote: (I wonder if I should stick some Ford wheel trims on it to tart it up??):
Hi, I can't tell if your wheels are 15" or 16".
If they are 16" and you not far from Bristol, I've got some trims going spare.
Regards,
Paul
-

paulrichardson - Transit Aficionado
- Posts: 364
- Joined: Wed Sep 22, 2010 4:39 pm
- Location: Clevedon, Somerset (Nr Weston-Super-Mare)
Re: My (hopefully) quick and (hopefully) cheap conversion.
![]() by d.e.hill » Mon Jun 08, 2015 10:34 pm
by d.e.hill » Mon Jun 08, 2015 10:34 pm
Thanks for that incredible offer Paul, unfortunately mine are 15"! Otherwise I'd have bitten your arm off...
For anyone wondering what's happened to the updates, I haven't disappeared, I've just been very busy! More to follow as soon as I can!
For anyone wondering what's happened to the updates, I haven't disappeared, I've just been very busy! More to follow as soon as I can!
- d.e.hill
- Transit Addict
- Posts: 97
- Joined: Mon Mar 30, 2015 10:54 pm
Re: My (hopefully) quick and (hopefully) cheap conversion.
![]() by 1robbie » Wed Jun 10, 2015 11:32 pm
by 1robbie » Wed Jun 10, 2015 11:32 pm
Does the £235 cost for the window kit give you the two windows?
Thanks
Thanks
- 1robbie
- Transit Addict
- Posts: 40
- Joined: Wed Jun 10, 2015 10:51 pm
Re: My (hopefully) quick and (hopefully) cheap conversion.
![]() by d.e.hill » Thu Jun 11, 2015 9:43 am
by d.e.hill » Thu Jun 11, 2015 9:43 am
That's for both, including fitting kit and trim!
- d.e.hill
- Transit Addict
- Posts: 97
- Joined: Mon Mar 30, 2015 10:54 pm
Re: My (hopefully) quick and (hopefully) cheap conversion.
![]() by d.e.hill » Tue Jun 16, 2015 11:02 pm
by d.e.hill » Tue Jun 16, 2015 11:02 pm
It's been a bit quiet on the conversion front recently, but as I'm off on a trip imminently in her, I thought I'd update you with some of the last few jobs I've been doing.
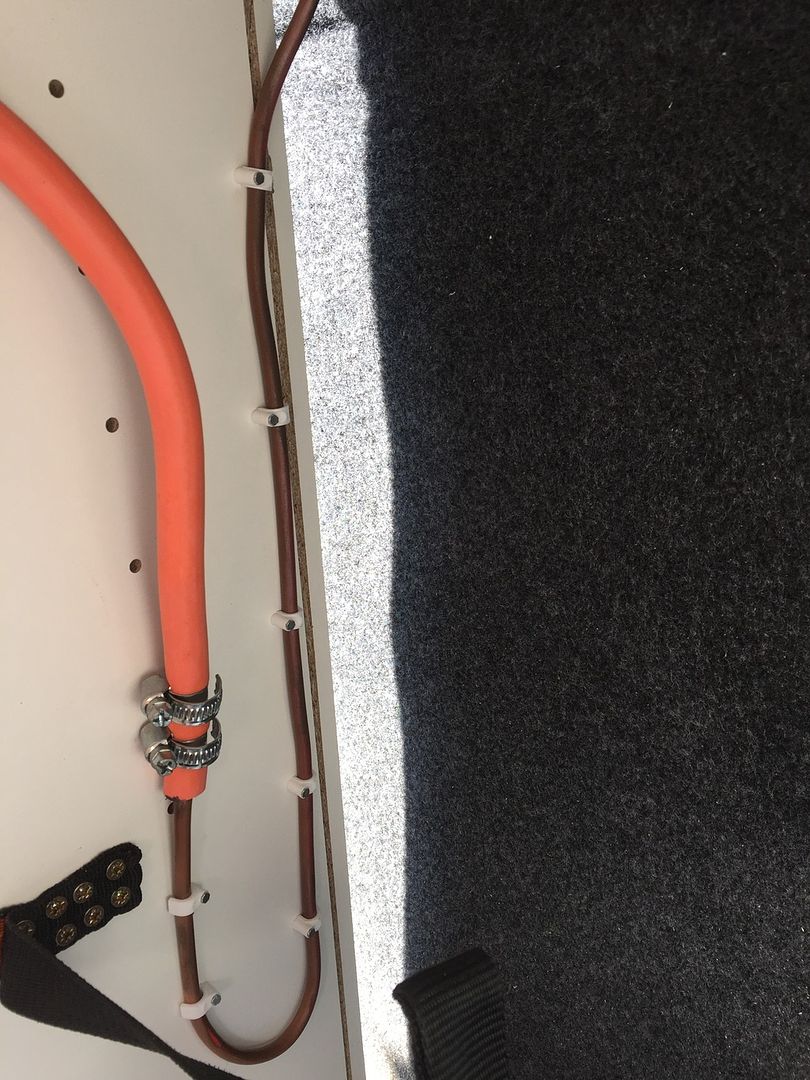
First was to secure the gas pipe to the "structure of the vehicle", for which I used cable pins. I don't really like this, but couldn't find anything more permanent for 6mm pipe - anyone any ideas?
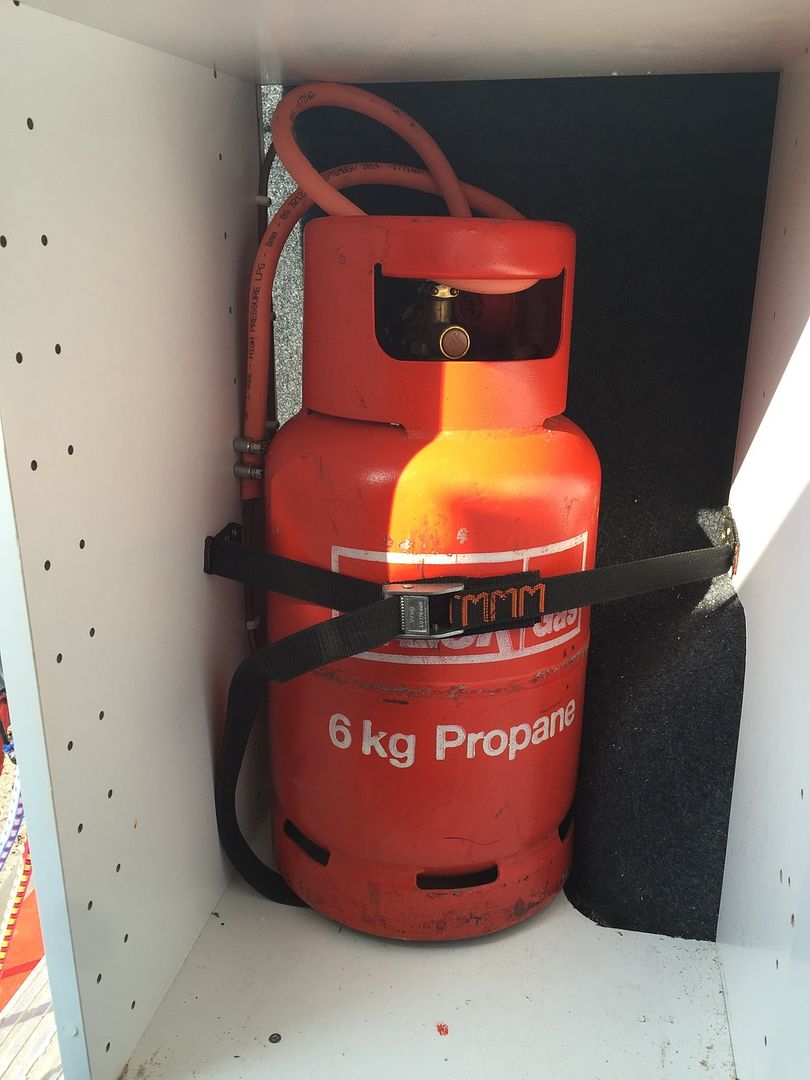
Next was to add a bit of flexipipe and regulator to connect to my 6kg propane cylinder. I also added an old bit of roofrack strap to secure the cylinder in place.

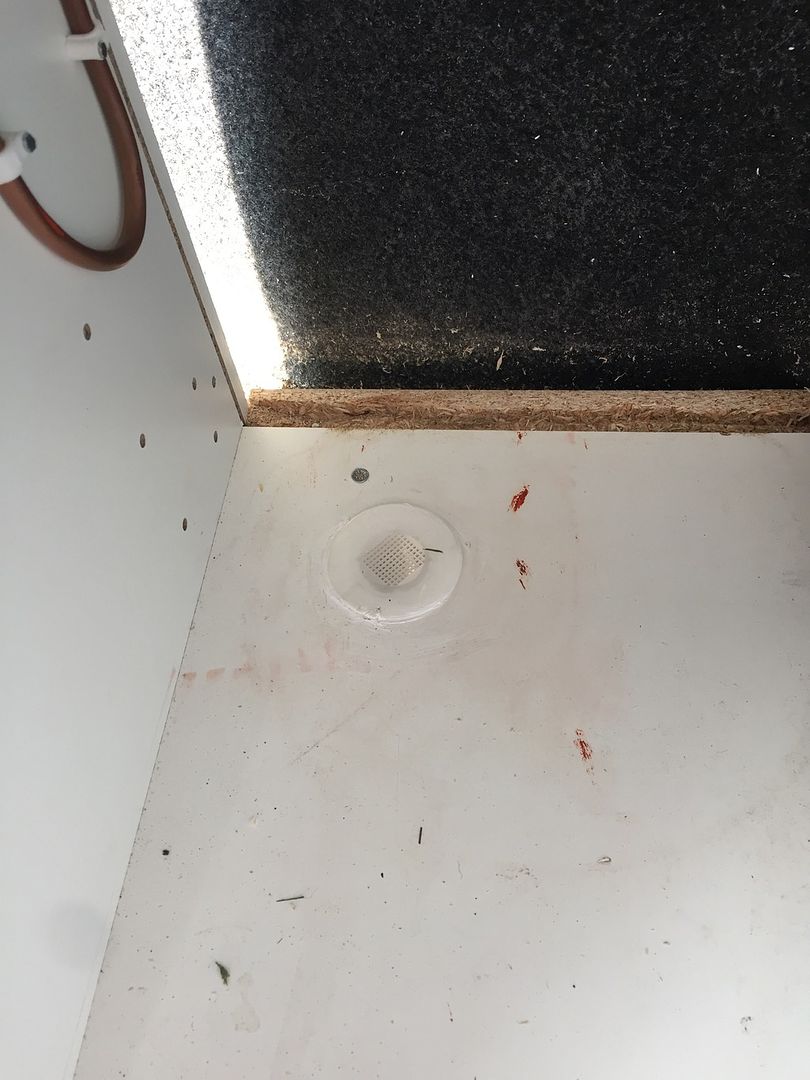
I also added a drop out vent. That was a case of cutting a hole in the bottom of the van (making sure not to cut anything vital), then making merry with the polyurethane sealant (Silkaflex type stuff) to seal it up. I used white to blend in with the cupboards.
This is how the setup looked:
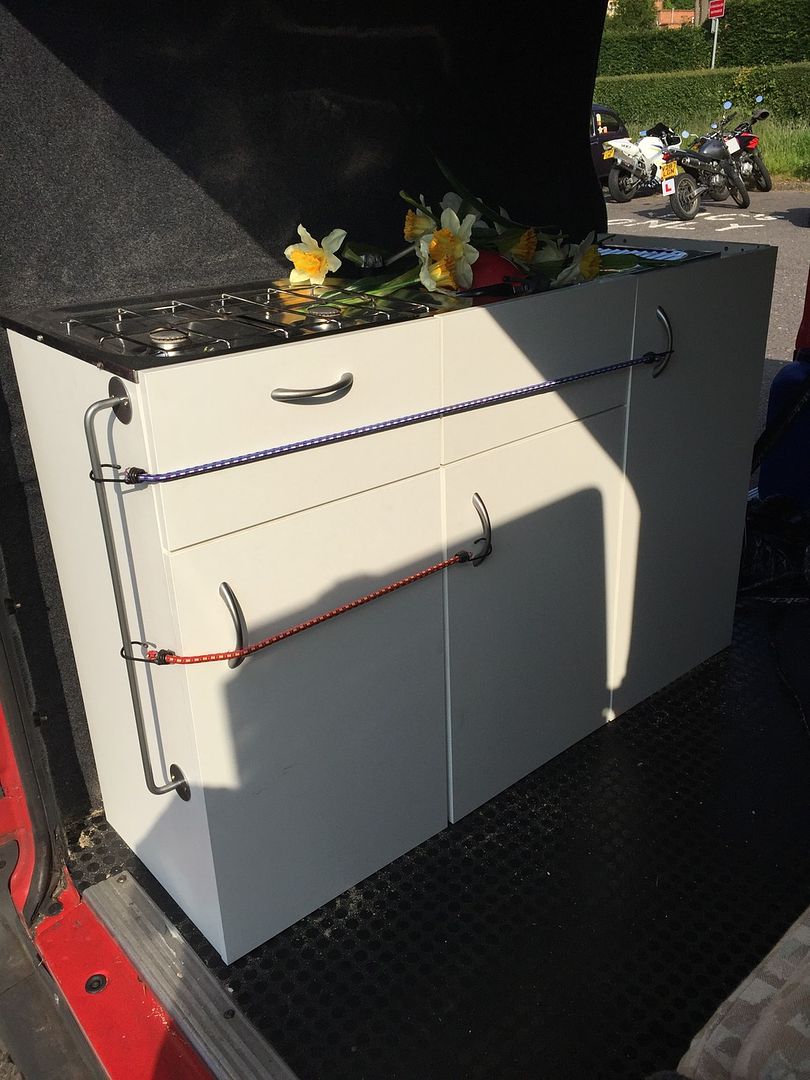
Next job was to stick some cupboard doors and handles on the kitchen. This wasn't hard, but took a bit of careful thought as I'd cut into the frames all over the place. I also added some hinges to the drawer fronts, so I have a hinged grill.
The rail at the end is to secure the cupboard doors in transit with a bungee or two...
While I was at it, I also added some edge trim to the countertop above the fridge. I think it looks great considering it came from a skip!
More soon!
First was to secure the gas pipe to the "structure of the vehicle", for which I used cable pins. I don't really like this, but couldn't find anything more permanent for 6mm pipe - anyone any ideas?

Next was to add a bit of flexipipe and regulator to connect to my 6kg propane cylinder. I also added an old bit of roofrack strap to secure the cylinder in place.

I also added a drop out vent. That was a case of cutting a hole in the bottom of the van (making sure not to cut anything vital), then making merry with the polyurethane sealant (Silkaflex type stuff) to seal it up. I used white to blend in with the cupboards.

This is how the setup looked:

Next job was to stick some cupboard doors and handles on the kitchen. This wasn't hard, but took a bit of careful thought as I'd cut into the frames all over the place. I also added some hinges to the drawer fronts, so I have a hinged grill.

The rail at the end is to secure the cupboard doors in transit with a bungee or two...

While I was at it, I also added some edge trim to the countertop above the fridge. I think it looks great considering it came from a skip!

More soon!
- d.e.hill
- Transit Addict
- Posts: 97
- Joined: Mon Mar 30, 2015 10:54 pm
Re: My (hopefully) quick and (hopefully) cheap conversion.
![]() by TriumphStag » Tue Jun 16, 2015 11:14 pm
by TriumphStag » Tue Jun 16, 2015 11:14 pm
Looks good. Could you not use magnetic latches on the cupboard doors rather than a bungee? Would look neater and you would never forget to do it like you might with the bungee?
2004 MK6 2.4 Duratorq MWB Medium Roof (in white!)
-

TriumphStag - Transit Aficionado
- Posts: 321
- Joined: Thu Jun 19, 2014 8:06 pm
Re: My (hopefully) quick and (hopefully) cheap conversion.
![]() by GuyT » Wed Jun 17, 2015 9:06 pm
by GuyT » Wed Jun 17, 2015 9:06 pm
This is awesome to read and even better because of all the photos you have included, fantastic.
I want to do something similar ( I havent even bought a van yet!! ) so I am reading this with great interest. If you have time, it seems you sealed the inside of the van with some sort of moisture (plastic) sheeting, what is the purpose of this? - I assume to keep the inside dry but will this not potentially cause rusting? I get the idea of the foil backed bubble wrap, I assume for insulation and I understand all the polystyrene insulation for noise and keep the cold out I assume?
Last thing, your kitchen cabinets are a work of art, really impressed with the workmanship but have to agree on some magnetic catches, you cant ruin your workmanship with the bungee chords
Looking forward to the next update.
I want to do something similar ( I havent even bought a van yet!!
Last thing, your kitchen cabinets are a work of art, really impressed with the workmanship but have to agree on some magnetic catches, you cant ruin your workmanship with the bungee chords
Looking forward to the next update.
- GuyT
- Transit Aficionado
- Posts: 138
- Joined: Tue Jun 16, 2015 10:38 am
Re: My (hopefully) quick and (hopefully) cheap conversion.
![]() by d.e.hill » Wed Jun 17, 2015 10:25 pm
by d.e.hill » Wed Jun 17, 2015 10:25 pm
Thanks for the comments guys. To answer your points in turn:
Top idea about the magnetic catches - I hadn't thought of that! I wonder if they'd be strong enough if I frying pan wanted to break free going around a corner? In any event, I'll give them a go but not anytime soon as I'm off camping tomorrow (more on that in a bit...)
The plastic sheeting was only used on the ceiling, as the walls were lined in Royal Mail's white plastic liner. It's called a vapour barrier and cuts down on condensation. Essentially, when we're asleep we're breathing out a load of moist air. The walls and ceiling of the van are cool as it's night time, so the breath condenses. This then drips, causes rust and makes the van damp. The plastic sheeting reduces this. It's a good reason for not using wool-type insulation as it can get soaked. The insulation (both foil and polystyrene) is for heat, not noise (although gluing the foil and carpet on does help with noise...). Cool in summer, warm in winter. At least, that's the idea.
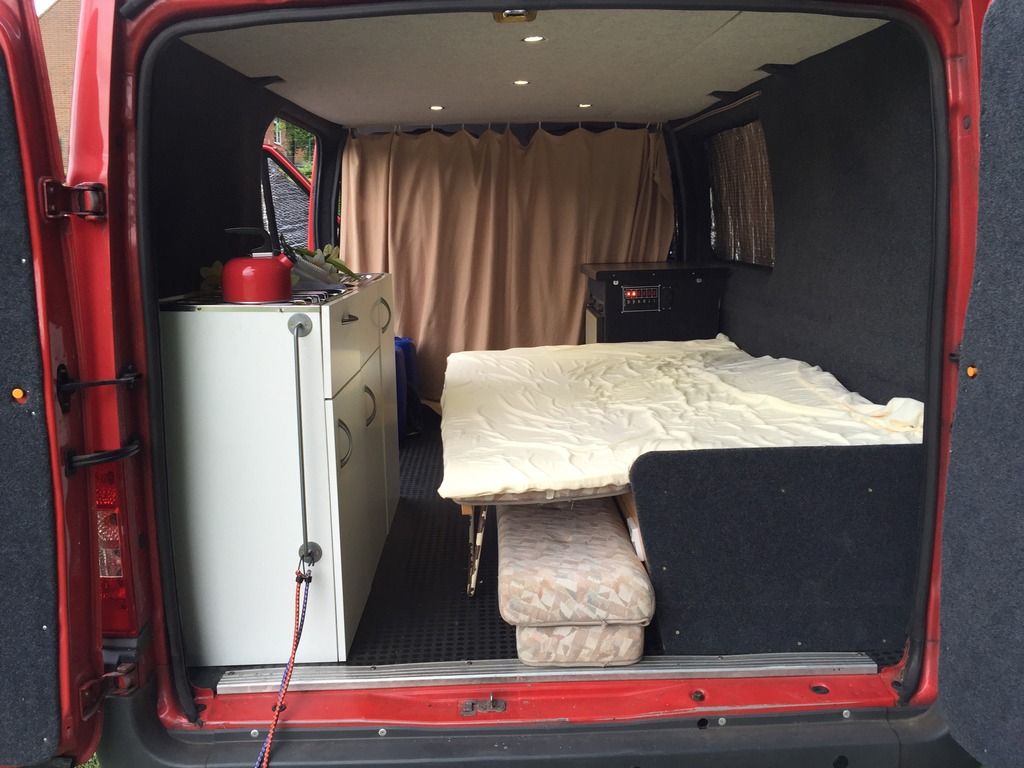
Anyway, I'm off to France tomorrow in the van, and am planning to live in her for 10 days, so I had to sort some quick-time finishing touches today to make her habitable. So far there's been about 12 days of full-time work to get from red van to the point in the photos below. Am I finished? Probably not, but not too far off!
Today's first job was to buy, size and cut down a nice memory foam mattress topper. This makes the bed oooodles comfier and was only £35 from B&M.
Next job was to make some thermal blinds for the windows. These are a massive source of heat in summer, heat loss in winter and (obviously) light. Thermal blinds cost a fortune, so I bought another roll of foil insulation (£7 - B&Q) and some 40mm suction pads (£3 - eBay) and got cutting.
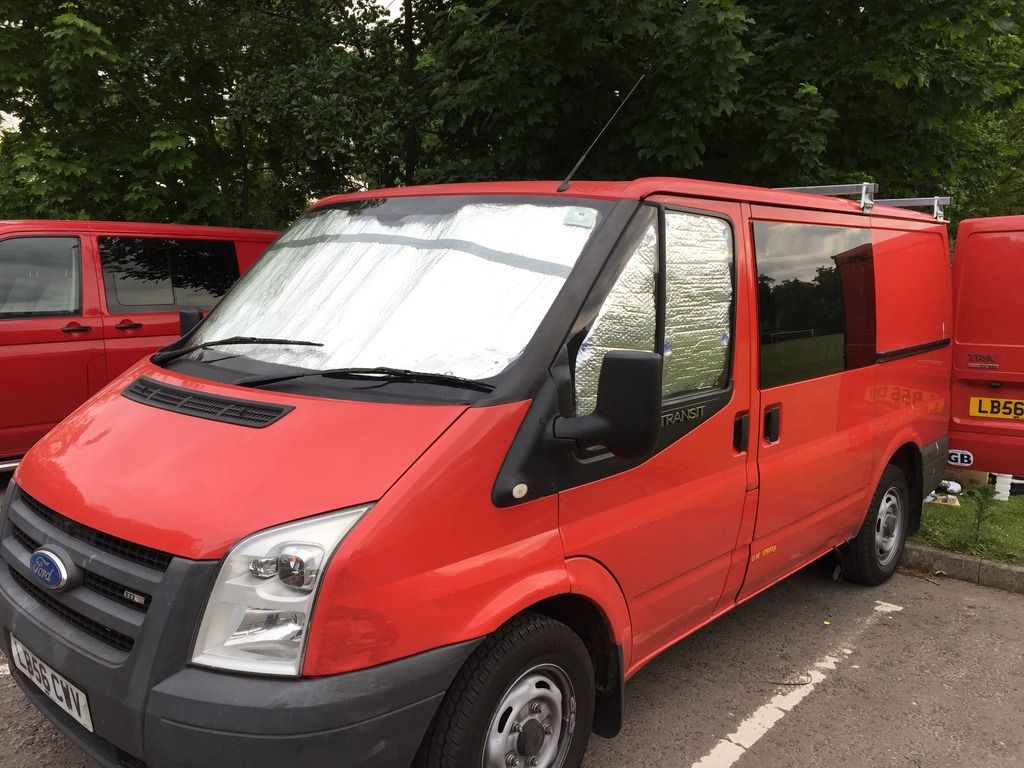
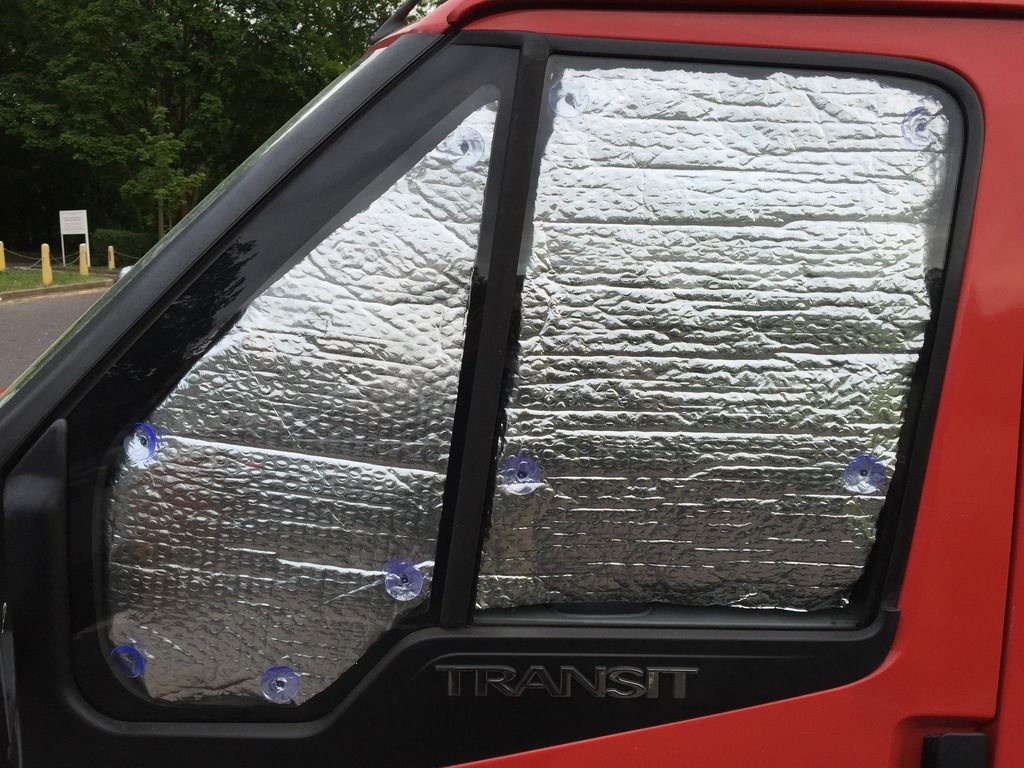
They seem to work well and it's nice and dark inside with them up!
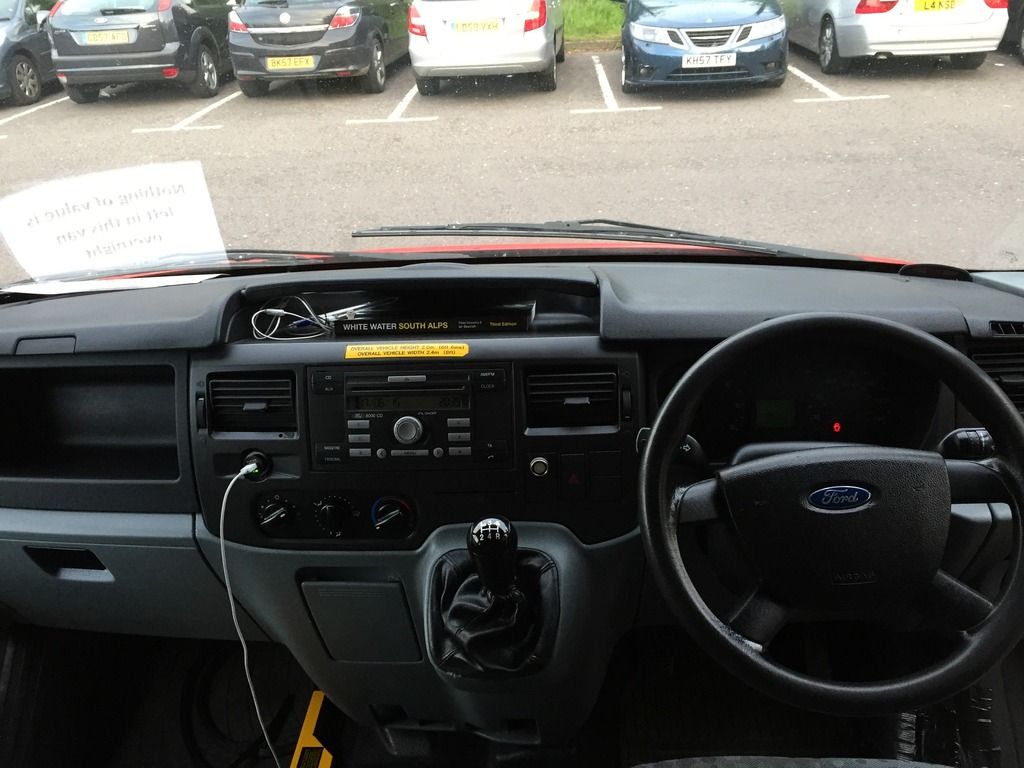
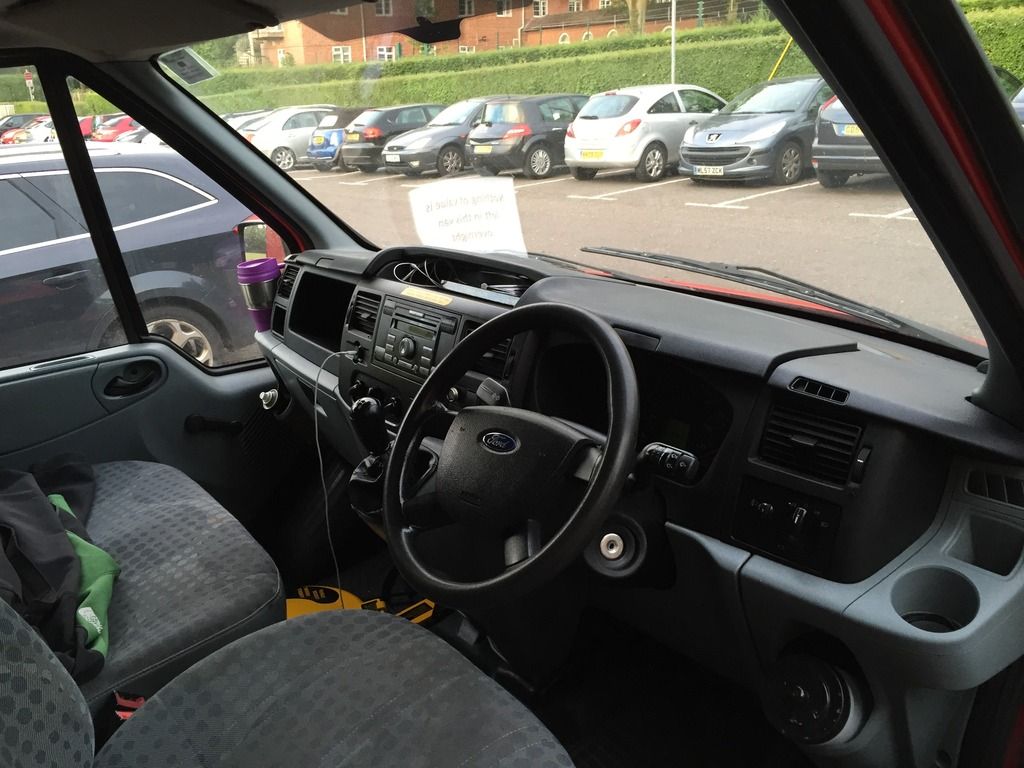
Final job then was to give the whole inside of a bit of a clean. Now I'm no detailer, so it was 4 or 5 quick washes in the cab with some soapy water (there was a decade of bloody awful Postman grime!), followed with a quick spray and wipe of B&M back-to-black. Quick job, but I don't think it looks too awful! The cupboards also got a wipe down to remove greasy fingerprints and a quick sweep out. Ready for our trip - I'll report how I get on!

Top idea about the magnetic catches - I hadn't thought of that! I wonder if they'd be strong enough if I frying pan wanted to break free going around a corner? In any event, I'll give them a go but not anytime soon as I'm off camping tomorrow (more on that in a bit...)
The plastic sheeting was only used on the ceiling, as the walls were lined in Royal Mail's white plastic liner. It's called a vapour barrier and cuts down on condensation. Essentially, when we're asleep we're breathing out a load of moist air. The walls and ceiling of the van are cool as it's night time, so the breath condenses. This then drips, causes rust and makes the van damp. The plastic sheeting reduces this. It's a good reason for not using wool-type insulation as it can get soaked. The insulation (both foil and polystyrene) is for heat, not noise (although gluing the foil and carpet on does help with noise...). Cool in summer, warm in winter. At least, that's the idea.
Anyway, I'm off to France tomorrow in the van, and am planning to live in her for 10 days, so I had to sort some quick-time finishing touches today to make her habitable. So far there's been about 12 days of full-time work to get from red van to the point in the photos below. Am I finished? Probably not, but not too far off!
Today's first job was to buy, size and cut down a nice memory foam mattress topper. This makes the bed oooodles comfier and was only £35 from B&M.

Next job was to make some thermal blinds for the windows. These are a massive source of heat in summer, heat loss in winter and (obviously) light. Thermal blinds cost a fortune, so I bought another roll of foil insulation (£7 - B&Q) and some 40mm suction pads (£3 - eBay) and got cutting.


They seem to work well and it's nice and dark inside with them up!
Final job then was to give the whole inside of a bit of a clean. Now I'm no detailer, so it was 4 or 5 quick washes in the cab with some soapy water (there was a decade of bloody awful Postman grime!), followed with a quick spray and wipe of B&M back-to-black. Quick job, but I don't think it looks too awful! The cupboards also got a wipe down to remove greasy fingerprints and a quick sweep out. Ready for our trip - I'll report how I get on!


- d.e.hill
- Transit Addict
- Posts: 97
- Joined: Mon Mar 30, 2015 10:54 pm
71 posts
• Page 3 of 5 • 1, 2, 3, 4, 5
Return to Camper vans and conversions
Who is online
Users browsing this forum: Google [Bot]