*NOW BOOKED FOR 2026* Transitmania 17 @ Santa Pod 17th to 19th July 2026 *ALL DETAILS HERE*


Pinto Bill's Mk4 SWB Van

This forum can be used to update other members on your progress with your Transit.

Pinto Bill's Mk4 SWB Van

Postby dieselhead123 » Tue Oct 02, 2012 2:14 pm

We are in the progress of refurbishing a Mk4 Transit Van for a forum member, Pinto Bill.

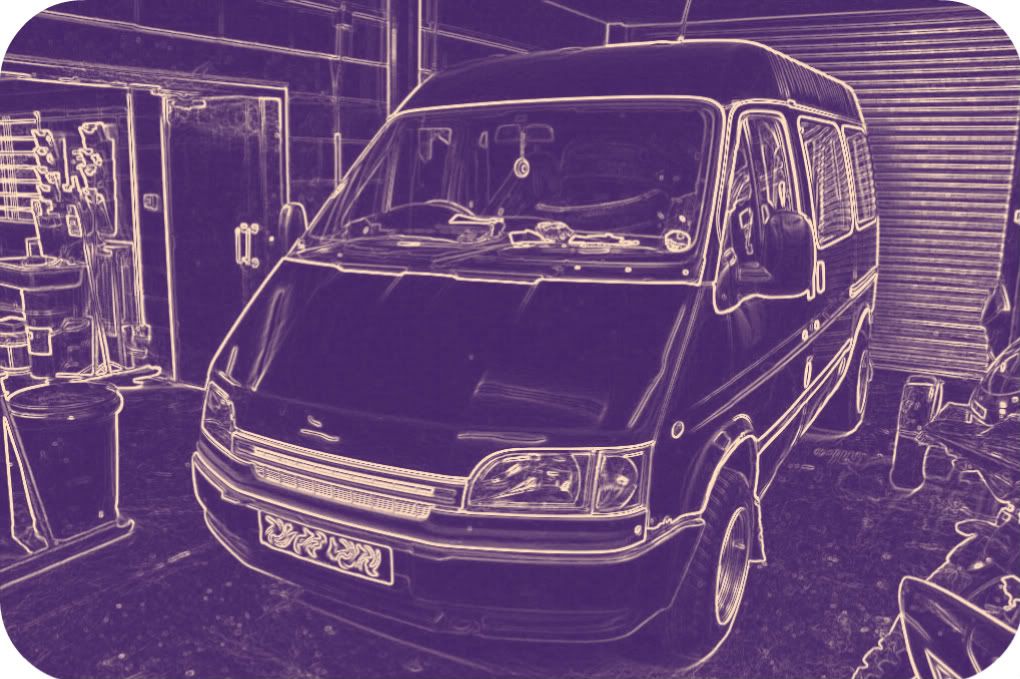
The van is a fairly tidy SWB with a factory Pinto engine and factory bulkhead.
Pinto Bill has owned the van since it was three years old and maintained it very well, but as with all Transits, there comes a time when a decision has to be made to tackle the 'tin worm' and provide a good few years more service.

Pinto Bill came to us to purchase the repair panels needed for his van and offered us the opportunity to carry out the refurbishment on his behalf. He has agreed that the progress report be posted on the Forum as an inspiration to others contemplating a rebuild.

Although we have a fully equipt workshop available to us, all the work you will see posted on this thread could be easily carried out with minimum tooling, most of which is readily available though a variety of outlets and of course eBay.

I will endeavor to provide as much information as to the procedures used as is possible in the hope that this information will be useful to others.

Firstly the rear wheel arch was tackled,
Image
As you can see, the rear wheel arch was trimmed to fit the replacement panel inside the rear quarter, some repairs were necessary to the inner arch. The inner arch is not available for the SWB model, we find using parts of an outer wheel arch panel from the opposite side, with slight adjustment, works well,
Image

In a case such as this, the rear lower corner normally needs some amount of work, while the outer wheel arch panel includes some of the rear lower corner, part of this panel needed to be fabricated,
Image
Image
As you can see, the outer wheel arch panel has been fitted behind the rear quarter panel, the rear lower corner repair being 'joggled' so as to step into the adjoining parts, minimising the repair 'lines'.
The panels are held in place with self tapping screws while placement is confirmed.

Once we were happy with the fit of the outer panels, these were unscrewed and work started on the inner rear lower corner area.
LightCommercialServices
Sales, Service and Repair for all Commercial Vehicles
Body panels manufactured and supplied
07754 806004
http://lightcommercialservices.weebly.com/
dieselhead123
Transit Fanatic
Transit Fanatic
 
Posts: 3514
Joined: Sun Jul 03, 2011 9:43 pm
Location: KENT UK

Re: Pinto Bill's Mk4 SWB Van

Postby dieselhead123 » Tue Oct 02, 2012 2:28 pm

The rotten material was removed back to 'clean' material,
Image
Parts were fabricated to repair the inner rear lower corner, unfortunately this part is not available as a repair panel and requires a fair deal of care in fabricating something close in shape to the original.
Image
Image
Image

Once the inner rear lower corner and inner rear wheel arch were fully repaired, a coat of paint was applied;
LightCommercialServices
Sales, Service and Repair for all Commercial Vehicles
Body panels manufactured and supplied
07754 806004
http://lightcommercialservices.weebly.com/
dieselhead123
Transit Fanatic
Transit Fanatic
 
Posts: 3514
Joined: Sun Jul 03, 2011 9:43 pm
Location: KENT UK

Re: Pinto Bill's Mk4 SWB Van

Postby dieselhead123 » Tue Oct 02, 2012 4:10 pm

Image
Image
Here we have used a Zinc Phosphate primer, be sure to paint the internal areas before the outer panels are fitted, it is the only chance you will get!
We also paint the inner surfaces of the outer panels prior to fitting, make sure you keep off the areas where you are going to weld, good conductivity is important, particularly when using a spot welder.

Re-fit the outer panels, securing with the self tapping screws, this will help to minimise distortion when welding.
Image

When welding, tack small areas at a time, moving around the repair area, allowing heat to dissipate will help to minimise distortion and the amount of 'post weld' rectification that will be required.
LightCommercialServices
Sales, Service and Repair for all Commercial Vehicles
Body panels manufactured and supplied
07754 806004
http://lightcommercialservices.weebly.com/
dieselhead123
Transit Fanatic
Transit Fanatic
 
Posts: 3514
Joined: Sun Jul 03, 2011 9:43 pm
Location: KENT UK

Re: Pinto Bill's Mk4 SWB Van

Postby dieselhead123 » Tue Oct 02, 2012 4:25 pm

We then moved on to the front end of the rear wheel arch and the center sill section, rusted material was removed from the outer sill section to reveal some corrosion of the inner sill, this was cut out as below,
Image
Image
As can be seen, the front end of the rear wheel arch normally suffers quite badly with these vans.

Image
Here, a new section of inner sill has been fitted, and seam welded both outside and inside. A strip of flat plate was used for this, the side inner sill not being available as a repair panel.

A small amount was cut from a side panel repair piece to provide the repair section for the outside, the edges of the hole around where the panel is to be installed are set back using a 'joggling' tool thus allowing the repair piece to sit 'flush' with the outside of the van.

Again, the repair area was painted inside prior to fitting in the outer repair panel.
LightCommercialServices
Sales, Service and Repair for all Commercial Vehicles
Body panels manufactured and supplied
07754 806004
http://lightcommercialservices.weebly.com/
dieselhead123
Transit Fanatic
Transit Fanatic
 
Posts: 3514
Joined: Sun Jul 03, 2011 9:43 pm
Location: KENT UK

Re: Pinto Bill's Mk4 SWB Van

Postby dieselhead123 » Tue Oct 02, 2012 4:43 pm

The front wheel arch and step area were in a bad way but not much worse than any Transit this age,
Image
The rotten areas were removed, beware though, do not remove too much material in one go or you will loose the lines and find it difficult to align multiple panels. We removed the front door step first, finding some repairs required to the inner step sill,
Image
A small hole in the door step,
Image
An the inevitable 'crush' of the inner sill where a jack had been used in the past,
Image

The door step was fitted and secured with self tapping screws, once we were happy with it's positioning, the panel was removed and the inner sill replaced, being spot welded to the underside of the step. Fortunately the inner sill repair panels are available and are a lot more practical to use as apposed to fabricating parts.
The door step sill was the repositioned, secured with the self tapping screws and spot welded to the door step flange and the new inner sill.

The front wheel arch was then fitted, I find it easier to fit this panel under the edge of the existing wheel arch, this is all done with the door in place so as to maintain the body lines.

Once this area was complete, the door was removed to allow final finishing and painting to be done.

TIM
LightCommercialServices
Sales, Service and Repair for all Commercial Vehicles
Body panels manufactured and supplied
07754 806004
http://lightcommercialservices.weebly.com/
dieselhead123
Transit Fanatic
Transit Fanatic
 
Posts: 3514
Joined: Sun Jul 03, 2011 9:43 pm
Location: KENT UK

Re: Pinto Bill's Mk4 SWB Van

Postby transitandy » Wed Oct 03, 2012 6:40 pm

Very nice work tim :)
TRANSIT M8, SAY NO MORE YOUR IN...... FORD THROUGH TO THE BONE......
User avatar
transitandy
Transit Extremist
Transit Extremist
 
Posts: 17753
Joined: Fri Nov 30, 2007 1:10 am
Location: Essex...

Re: Pinto Bill's Mk4 SWB Van

Postby Eric b » Wed Oct 03, 2012 7:10 pm

good post cheers, nice work as well. cant wait to get me welder :D
mk6 2.4tddi 90 mwb semi , mk7 260 2.2 swb medium roof
Eric b
Transit Addict
Transit Addict
 
Posts: 50
Joined: Sun Aug 12, 2012 12:34 pm
Location: manchester

Re: Pinto Bill's Mk4 SWB Van

Postby familybanger » Wed Oct 10, 2012 12:25 am

Good work and detailed thread. In my limited experience I've not seen use of the screws before, makes sense to me though. I really need to throw a repair panel or 3 at my van sometime soon as the cost of fresh gaffa tape for every MOT is mounting up! It's never going to be a long term solution either.

So, you sell panels in Kent? Hmm could be a useful contact as I'm not far from the North Kent border.
User avatar
familybanger
Transit Aficionado
Transit Aficionado
 
Posts: 277
Joined: Fri Oct 16, 2009 11:16 pm
Location: Sarf East London

Re: Pinto Bill's Mk4 SWB Van

Postby dieselhead123 » Wed Oct 10, 2012 12:47 pm

Thanks for the positive comments lads.

The replacement of the inner and outer rear cross members is in the process of being done, hopefully the progress report can be both instructional and inspirational, helping some of you to tackle body repairs on your own vans.

More to come,

TIM
LightCommercialServices
Sales, Service and Repair for all Commercial Vehicles
Body panels manufactured and supplied
07754 806004
http://lightcommercialservices.weebly.com/
dieselhead123
Transit Fanatic
Transit Fanatic
 
Posts: 3514
Joined: Sun Jul 03, 2011 9:43 pm
Location: KENT UK

Re: Pinto Bill's Mk4 SWB Van

Postby dieselhead123 » Tue Oct 16, 2012 12:33 pm

Some pics of the drivers side now painted;
Front step;
Image
Front wing;
Image
Rear quarter panel;
Image
A view down the side of the van;
Image

Quite a transformation :D
TIM
LightCommercialServices
Sales, Service and Repair for all Commercial Vehicles
Body panels manufactured and supplied
07754 806004
http://lightcommercialservices.weebly.com/
dieselhead123
Transit Fanatic
Transit Fanatic
 
Posts: 3514
Joined: Sun Jul 03, 2011 9:43 pm
Location: KENT UK

Re: Pinto Bill's Mk4 SWB Van

Postby dieselhead123 » Tue Oct 16, 2012 12:50 pm

As mentioned earlier, the rear cross members, both inner and outer are being replaced, the outer panel is a available pattern from my supplier but the inner part is Ford only, fortunately this is still available for the Mk4 as it is the same panel as the Mk5.
Removing the outer cross member is fairly straight forward, but the inner part is rather tricky, being fitted between the chassis rails and the rear floor.
In this picture the inner cross member has been almost completely removed;
Image
Here we can see a close-up of where the inner cross member is fitted between the rear spring hanger section and the rear floor;
Image
Some care and patience is required to completely remove the old cross member panel in readiness for replacement.

We were expecting to find some corrosion lurking between the inner and outer cross members but were surprised by how much, had the decision not been made to replace the cross members, this would have remained entombed for ever!
Image
Repair plates were fabricated;
Image

More to follow,
TIM
LightCommercialServices
Sales, Service and Repair for all Commercial Vehicles
Body panels manufactured and supplied
07754 806004
http://lightcommercialservices.weebly.com/
dieselhead123
Transit Fanatic
Transit Fanatic
 
Posts: 3514
Joined: Sun Jul 03, 2011 9:43 pm
Location: KENT UK

Re: Pinto Bill's Mk4 SWB Van

Postby dieselhead123 » Wed Oct 17, 2012 6:24 pm

Today the rear cross members were fitted.
The rear inner cross member is a bit fiddly to insert as it goes behind the rear pillar panels but in front of the chassis rails and below the floor, it requires a small amount of flexing to get it in place.
It was secured to the rear of the chassis rails with screws while the fit was confirmed;
Image
it will be spot welded to the rear of the rails, alternatively, you could drill holes in the panel and plunge weld with mig.
It is important to ensure that all areas to be welded are paint free;
Image
As can be seen from the picture, the corner pillar panels need to be temporarily bent out to allow the inner cross member to be fitted.
These were then hammered back onto the cross member;
Image

Before the inner part was welded in place, we trial fitted the outer cross member panel;
Image
Image
As you can see, this was held in place with screws to confirm that we had achieved a satisfactory fit of both panels.
The outer panel was then removed to allow the inner part to be welded, spot welding will be employed wherever practical, but a satisfactory result could easily be obtained with the use of a mig welder, 'plunge welding' through drilled holes.

TIM
LightCommercialServices
Sales, Service and Repair for all Commercial Vehicles
Body panels manufactured and supplied
07754 806004
http://lightcommercialservices.weebly.com/
dieselhead123
Transit Fanatic
Transit Fanatic
 
Posts: 3514
Joined: Sun Jul 03, 2011 9:43 pm
Location: KENT UK

Re: Pinto Bill's Mk4 SWB Van

Postby dieselhead123 » Tue Oct 23, 2012 6:27 pm

Now, as promised, some pics of the inner rear cross member being welded in place;
Image
Here we see spot welds applied to secure the rear inner cross member panel to the ends of the chassis rails and the rear spring hanger supports. The self tapping screw are removed as the spot welds are applied, thus keeping the panel in place.
Image

It was not possible to gain access to all the places where welding was required, in these cases the panel was drilled using a spot weld cutter and plunge welded from inside the cross member, this will provide a neat factory look when viewed from under the van.

Where the ends of the inner rear cross member joins the rear pillars we can see a fair bit of corrosion, the reinforcing panel, (no longer supplied by Fords), is almost gone;
Image
Replacement parts were fabricated, here we can see the left hand one in place, spot welded to the lower part of the rear panel;
Image
Image

A fair bit of additional work for a part that can only just be seen with the outer cross member panel in place, but at least the 'factory' strength has been retained.

One thing I have learned is that whether it is a rusty old Transit or an 'E' type Jag, the repair principles are the same....

Do it once.......Do it right!

TIM
LightCommercialServices
Sales, Service and Repair for all Commercial Vehicles
Body panels manufactured and supplied
07754 806004
http://lightcommercialservices.weebly.com/
dieselhead123
Transit Fanatic
Transit Fanatic
 
Posts: 3514
Joined: Sun Jul 03, 2011 9:43 pm
Location: KENT UK

Re: Pinto Bill's Mk4 SWB Van

Postby MinorMatt » Tue Oct 23, 2012 7:52 pm

Tim,

One of the pictures above looks like the holes for the bumper irons are not correctly aligned... I'm sure its just a trick of the camera but I thought I had better point it out in case its not!1http://fordtransit.org/forum/posting.php?mode=reply&f=27&t=116704#
Lucas Laser 2000/IDS
95 Pre Production DRW TD Highcube
95 Hallmark
96 150 100PS LWB Hi-Top
96 Autosleeper Duetto
06 Mk7 (scrap)
09 140PS T330S 2.2

Gaffa tape is like the force, it has a light side, a dark side, and it holds the universe together
User avatar
MinorMatt
Transit Extremist
Transit Extremist
 
Posts: 24611
Joined: Mon Sep 17, 2007 7:53 pm
Location: Herefordshire/Gloucestershire/Berkshire

Re: Pinto Bill's Mk4 SWB Van

Postby dieselhead123 » Tue Oct 23, 2012 9:37 pm

I see the one you mean mate, with the outer temporarily in position?

I will check that before the outer is finally fitted.

TIM
LightCommercialServices
Sales, Service and Repair for all Commercial Vehicles
Body panels manufactured and supplied
07754 806004
http://lightcommercialservices.weebly.com/
dieselhead123
Transit Fanatic
Transit Fanatic
 
Posts: 3514
Joined: Sun Jul 03, 2011 9:43 pm
Location: KENT UK

Next

Return to Members Transit's - Progress Reports!


Who is online

Users browsing this forum: No registered users

This site contains affiliate links for which we may be compensated.