We have been given the job of fitting some front end panels to a Mk3 motorhome that suffered an accident in the recent bad weather, the owner was planning a minor refurb prior to the incident and has agreed that a progress report be posted on the forum to provide advice and assistance to others contemplating similar work.
The van will have the front cross member, inner and outer sections, replaced together with a front wing and, subject to availability, a near side headlamp panel.
We are expecting to be in possession of all the parts needed to complete the repair soon and will post up pictures of the progress.
TIM
*NOW BOOKED FOR 2026* Transitmania 17 @ Santa Pod 17th to 19th July 2026 *ALL DETAILS HERE*
Mk3 motorhome body refurbishment
14 posts
• Page 1 of 1
Mk3 motorhome body refurbishment
![]() by dieselhead123 » Sun Mar 17, 2013 1:03 am
by dieselhead123 » Sun Mar 17, 2013 1:03 am
LightCommercialServices
Sales, Service and Repair for all Commercial Vehicles
Body panels manufactured and supplied
07754 806004
http://lightcommercialservices.weebly.com/
Sales, Service and Repair for all Commercial Vehicles
Body panels manufactured and supplied
07754 806004
http://lightcommercialservices.weebly.com/
- dieselhead123
- Transit Fanatic

- Posts: 3514
- Joined: Sun Jul 03, 2011 9:43 pm
- Location: KENT UK
Re: Mk3 motorhome body refurbishment
![]() by dieselhead123 » Sun Apr 07, 2013 3:44 pm
by dieselhead123 » Sun Apr 07, 2013 3:44 pm
Right then lads, finally got my head around this imageshack thing, photobucket still does not work for me 
Some pics of the damage, these were submitted to the insurers as part of the quote;


Despite the pictures clearly showing the damage, the insurers spent four weeks arranging for a mobile assessor to view the van in the hope of reducing the repair cost!
More to come,
TIM
Some pics of the damage, these were submitted to the insurers as part of the quote;
Despite the pictures clearly showing the damage, the insurers spent four weeks arranging for a mobile assessor to view the van in the hope of reducing the repair cost!
More to come,
TIM
LightCommercialServices
Sales, Service and Repair for all Commercial Vehicles
Body panels manufactured and supplied
07754 806004
http://lightcommercialservices.weebly.com/
Sales, Service and Repair for all Commercial Vehicles
Body panels manufactured and supplied
07754 806004
http://lightcommercialservices.weebly.com/
- dieselhead123
- Transit Fanatic
- Posts: 3514
- Joined: Sun Jul 03, 2011 9:43 pm
- Location: KENT UK
Re: Mk3 motorhome body refurbishment
![]() by dieselhead123 » Sun Apr 07, 2013 4:59 pm
by dieselhead123 » Sun Apr 07, 2013 4:59 pm
Having uploaded some pics of the repair so far, here we go;
Once repairs were approved, we collected the camper and set to work.
The damaged bonnet and hinges were removed, the hinges were straightened and the replacement bonnet fitted, this gave us some 'lines' to work to.
We removed the damaged slam panel, radiator, radiator fan, grille, front bumper and viscous hub.
The next job was to set about removing the near side front wing and the front cross member.
The front cross member is fitted onto the lower part of the headlamp panels and between the upper and lower chassis rails at the spring hangers. The owner was quite lucky that the insurance assessor accepted that this needed replacement as the damage to it was minimal, but the rust was rather excessive, it just fell off!
The picture below shows the replacement inner cross member in place, the lower edges of the headlamp panels had to be repaired where they fix to the cross member. This would have been an ideal time to replace them but the owner is unable to find the additional costs. Replacing the headlamp panels will require removal of both the front wing and the front cross member, but beware, these are in short supply and are only available as 'special order' from the manufacturers.

Some close ups of the inner front cross member attachments;


In the last picture you can see the self drill fixings used to temporarily secure the panel in place, all the panels will be fitted like this, enabling full alignment to be checked before any welding takes place.
Here you can see the wing has been fitted to check alignment;


The area behind the end of the front bumper, below the wing on the near side did have some damage but was very rusty, we chose to replace this.
Unfortunately, inner front wheel arches are not available for the Mk3, but we had kept this parts from Pinto Bill's Mk4, to use on this van.
This part of the Mk4 is deeper, extending further downwards, we removed the excess and shaped the panel at the lower edge to mimic the Mk3 panel, used the edge setter to get the joint flush. Here you see it fitted behind the wing while alignment is confirmed;

Once panel alignment was confirmed;

welding commenced;
The repair piece for the inner wheel arch was first;

Then the inner front cross member;
As you see, some of the areas that require welding are difficult to get to with the spot welder, so mig seams have been applied for strength on the areas that will not eventually be visible.
This area was easy to apply the spot welds, but remember to clean both sides of the replacement panels before you fit them;

The last pic shows where mig 'spots' were applied to areas that the spot welder would not reach and to fill the holes where the self drill screws were removed.
That was about all we got done in one day, but there will be more to follow.
TIM
Once repairs were approved, we collected the camper and set to work.
The damaged bonnet and hinges were removed, the hinges were straightened and the replacement bonnet fitted, this gave us some 'lines' to work to.
We removed the damaged slam panel, radiator, radiator fan, grille, front bumper and viscous hub.
The next job was to set about removing the near side front wing and the front cross member.
The front cross member is fitted onto the lower part of the headlamp panels and between the upper and lower chassis rails at the spring hangers. The owner was quite lucky that the insurance assessor accepted that this needed replacement as the damage to it was minimal, but the rust was rather excessive, it just fell off!
The picture below shows the replacement inner cross member in place, the lower edges of the headlamp panels had to be repaired where they fix to the cross member. This would have been an ideal time to replace them but the owner is unable to find the additional costs. Replacing the headlamp panels will require removal of both the front wing and the front cross member, but beware, these are in short supply and are only available as 'special order' from the manufacturers.
Some close ups of the inner front cross member attachments;
In the last picture you can see the self drill fixings used to temporarily secure the panel in place, all the panels will be fitted like this, enabling full alignment to be checked before any welding takes place.
Here you can see the wing has been fitted to check alignment;
The area behind the end of the front bumper, below the wing on the near side did have some damage but was very rusty, we chose to replace this.
Unfortunately, inner front wheel arches are not available for the Mk3, but we had kept this parts from Pinto Bill's Mk4, to use on this van.
This part of the Mk4 is deeper, extending further downwards, we removed the excess and shaped the panel at the lower edge to mimic the Mk3 panel, used the edge setter to get the joint flush. Here you see it fitted behind the wing while alignment is confirmed;
Once panel alignment was confirmed;
welding commenced;
The repair piece for the inner wheel arch was first;
Then the inner front cross member;
As you see, some of the areas that require welding are difficult to get to with the spot welder, so mig seams have been applied for strength on the areas that will not eventually be visible.
This area was easy to apply the spot welds, but remember to clean both sides of the replacement panels before you fit them;
The last pic shows where mig 'spots' were applied to areas that the spot welder would not reach and to fill the holes where the self drill screws were removed.
That was about all we got done in one day, but there will be more to follow.
TIM
LightCommercialServices
Sales, Service and Repair for all Commercial Vehicles
Body panels manufactured and supplied
07754 806004
http://lightcommercialservices.weebly.com/
Sales, Service and Repair for all Commercial Vehicles
Body panels manufactured and supplied
07754 806004
http://lightcommercialservices.weebly.com/
- dieselhead123
- Transit Fanatic
- Posts: 3514
- Joined: Sun Jul 03, 2011 9:43 pm
- Location: KENT UK
Re: Mk3 motorhome body refurbishment
![]() by AlanN » Sun Apr 07, 2013 8:56 pm
by AlanN » Sun Apr 07, 2013 8:56 pm
Very productive day me thinks Tim 
- AlanN
- Site Moderator
- Posts: 14176
- Joined: Mon Jan 01, 2007 1:23 pm
- Location: Rayleigh Essex
Re: Mk3 motorhome body refurbishment
![]() by dieselhead123 » Sun Apr 07, 2013 9:13 pm
by dieselhead123 » Sun Apr 07, 2013 9:13 pm
AlanN wrote:Very productive day me thinks Tim
If's surprising what you can get done when you turn the phone off
TIM
LightCommercialServices
Sales, Service and Repair for all Commercial Vehicles
Body panels manufactured and supplied
07754 806004
http://lightcommercialservices.weebly.com/
Sales, Service and Repair for all Commercial Vehicles
Body panels manufactured and supplied
07754 806004
http://lightcommercialservices.weebly.com/
- dieselhead123
- Transit Fanatic
- Posts: 3514
- Joined: Sun Jul 03, 2011 9:43 pm
- Location: KENT UK

Re: Mk3 motorhome body refurbishment
![]() by ColinJack » Sun Apr 07, 2013 9:25 pm
by ColinJack » Sun Apr 07, 2013 9:25 pm
dieselhead123 wrote:
If's surprising what you can get done when you turn the phone off
TIM
1989 Mk3 Reimo Camper
1980 Mk2 Holdsworth Camper
I don't regret growing old - it is a privilege denied to many.
The Journey is the Reward. (Chinese Proverb)
1980 Mk2 Holdsworth Camper
I don't regret growing old - it is a privilege denied to many.
The Journey is the Reward. (Chinese Proverb)
-

ColinJack - MK3 Massive
- Posts: 1356
- Joined: Tue Feb 14, 2012 8:00 pm
- Location: Norfolk
Re: Mk3 motorhome body refurbishment
![]() by dieselhead123 » Sun Apr 07, 2013 9:41 pm
by dieselhead123 » Sun Apr 07, 2013 9:41 pm
PintoBill wrote:looking Good Tim
And we managed to 're-cycle' part of your van
TIM
LightCommercialServices
Sales, Service and Repair for all Commercial Vehicles
Body panels manufactured and supplied
07754 806004
http://lightcommercialservices.weebly.com/
Sales, Service and Repair for all Commercial Vehicles
Body panels manufactured and supplied
07754 806004
http://lightcommercialservices.weebly.com/
- dieselhead123
- Transit Fanatic
- Posts: 3514
- Joined: Sun Jul 03, 2011 9:43 pm
- Location: KENT UK
Re: Mk3 motorhome body refurbishment
![]() by dieselhead123 » Sat Apr 13, 2013 7:18 am
by dieselhead123 » Sat Apr 13, 2013 7:18 am
Since my last post we have spot welded on the outer front cross member panel, and painted the van, sorry no pics of the outer being fitted 
The owner has been to inspect our work and is very happy with the eventual result and is planning the 'next stage'!
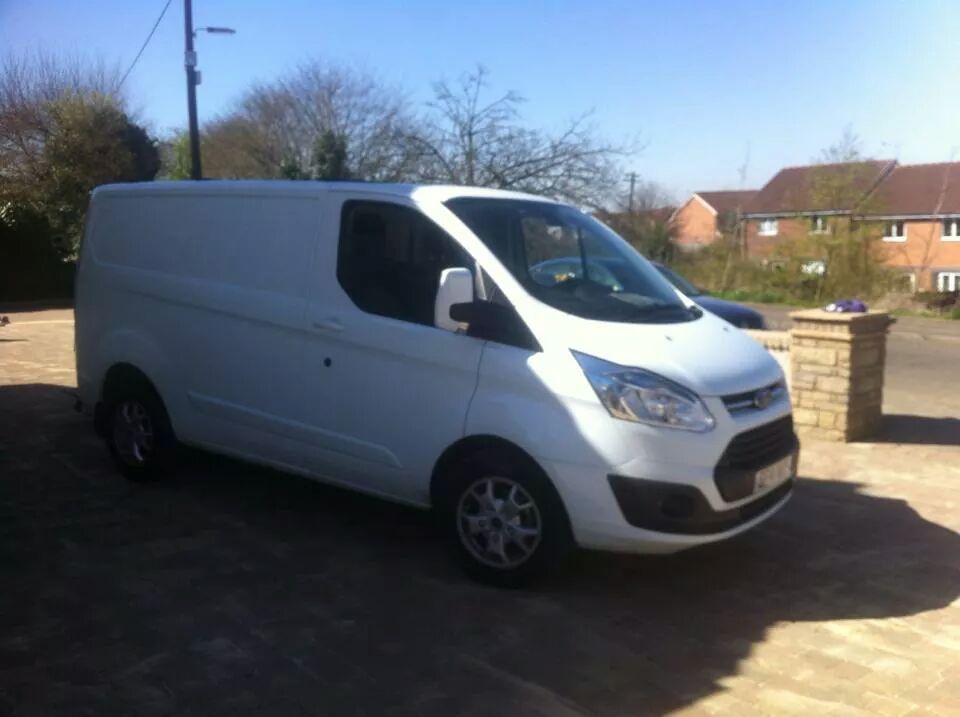
Some pics of the further progress;
The slam panel was painted 'off the vehicle',

View of the front wing,

and of the front,

'De-masked' and a few parts installed,


They always look better once re-assembly takes place.
TIM
The owner has been to inspect our work and is very happy with the eventual result and is planning the 'next stage'!
Some pics of the further progress;
The slam panel was painted 'off the vehicle',
View of the front wing,
and of the front,
'De-masked' and a few parts installed,
They always look better once re-assembly takes place.
TIM
LightCommercialServices
Sales, Service and Repair for all Commercial Vehicles
Body panels manufactured and supplied
07754 806004
http://lightcommercialservices.weebly.com/
Sales, Service and Repair for all Commercial Vehicles
Body panels manufactured and supplied
07754 806004
http://lightcommercialservices.weebly.com/
- dieselhead123
- Transit Fanatic
- Posts: 3514
- Joined: Sun Jul 03, 2011 9:43 pm
- Location: KENT UK
Re: Mk3 motorhome body refurbishment
![]() by ColinJack » Sat Apr 13, 2013 10:40 am
by ColinJack » Sat Apr 13, 2013 10:40 am
Looking very tidy ...
Need to change the date on the camera though.
Need to change the date on the camera though.
1989 Mk3 Reimo Camper
1980 Mk2 Holdsworth Camper
I don't regret growing old - it is a privilege denied to many.
The Journey is the Reward. (Chinese Proverb)
1980 Mk2 Holdsworth Camper
I don't regret growing old - it is a privilege denied to many.
The Journey is the Reward. (Chinese Proverb)
-
ColinJack - MK3 Massive
- Posts: 1356
- Joined: Tue Feb 14, 2012 8:00 pm
- Location: Norfolk
Re: Mk3 motorhome body refurbishment
![]() by dieselhead123 » Sat Apr 13, 2013 5:39 pm
by dieselhead123 » Sat Apr 13, 2013 5:39 pm
ColinJack wrote:Need to change the date on the camera though.
If only I knew how
TIM
LightCommercialServices
Sales, Service and Repair for all Commercial Vehicles
Body panels manufactured and supplied
07754 806004
http://lightcommercialservices.weebly.com/
Sales, Service and Repair for all Commercial Vehicles
Body panels manufactured and supplied
07754 806004
http://lightcommercialservices.weebly.com/
- dieselhead123
- Transit Fanatic
- Posts: 3514
- Joined: Sun Jul 03, 2011 9:43 pm
- Location: KENT UK
Re: Mk3 motorhome body refurbishment
![]() by ColinJack » Sat Apr 13, 2013 6:09 pm
by ColinJack » Sat Apr 13, 2013 6:09 pm
dieselhead123 wrote:ColinJack wrote:Need to change the date on the camera though.
If only I knew how
TIM
Ask Mrs Dieselhead.
1989 Mk3 Reimo Camper
1980 Mk2 Holdsworth Camper
I don't regret growing old - it is a privilege denied to many.
The Journey is the Reward. (Chinese Proverb)
1980 Mk2 Holdsworth Camper
I don't regret growing old - it is a privilege denied to many.
The Journey is the Reward. (Chinese Proverb)
-
ColinJack - MK3 Massive
- Posts: 1356
- Joined: Tue Feb 14, 2012 8:00 pm
- Location: Norfolk
Re: Mk3 motorhome body refurbishment
![]() by transitandy » Sun Apr 14, 2013 1:04 pm
by transitandy » Sun Apr 14, 2013 1:04 pm
Lovely work 
TRANSIT M8, SAY NO MORE YOUR IN...... FORD THROUGH TO THE BONE......
-

transitandy - Transit Extremist

- Posts: 17753
- Joined: Fri Nov 30, 2007 1:10 am
- Location: Essex...
14 posts
• Page 1 of 1
Return to Members Transit's - Progress Reports!
Who is online
Users browsing this forum: No registered users