The blue bit is the load space I use. This is always the same. I already fitted 2 truck/coach seats behind the drivers/pass seats to accomadate the other two members of my crew. So i got to thinking I would like to fit a bed for me when I've just driven 6 hours after a 13hour shift and need to sleep for a while. I also would like to ply line it all out. So I set about it last weekend and just for you lucky people I took some photos.
Please bear in mind I aint a joiner or anything like that so some of my methods may be wrong to those more knowlegable than me. Also some of my references to the van parts may be not correct but you'll get the picture.
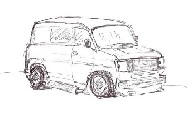
This is my plan...

So I got my Black n Decker jigsaw out, van load of ply wood and away I went...
1. Knocked down the old chipboard partition. Noticed how big these vans actually are when you can see one end to the other.
2. Started by bolt a piece of 2x1 across the width of the van, then 4 uprights then topped it off with another 2x1 across the width again and using 'L' brackets, attached the whole thing to the side of the van.
3. I then did the same again but upside down from the roof, about 2' 3" further back. This was all carefully measured so the two cross pieces lined up facing each other...

4. Then I fit some 2x1 pieces to attached these two together. As this was going to form the base of my bed I used thicker/longer alen key bolts.
Finally I put in place two 2x1 supports coming from the under side to the floor, positioned at the rear to support my weight and stop me ending up in with the load during the night.
This is looking from the load area towards the front...

...and this is from the second row of seats towards the back..

5. Now was a good time for a brew and I sat for 10 minutes contenplating my next move.
ten minutes later...
I cut out the correct shape of ply wood to do the front panel. Im using 6mm ply for all the panelling and 15mm ply for the base of the bed.
I offered it up, double checked the fitting, made a couple of adjustments then with the nail gun, nailed that sucker to the framework. BANG BANG BANG BANG, neighbours are well impressed at this point. One or two curtains twitching.
I did the same for the back of the bottom section and the back of the top section, then I fit the base of the bed. Finally I fit the front of the top section. Just a note: In between the panels I used some loft insullation.

6. Today I will atempt to ply line the rear load area. I carefully measure up, then measure up again, and then have a brew and finally check that measuring again. The jigsaw is revved up and away I go. whoa! this is fun!
success! it fits like a glove.


7. I want a shelf up near the top, to store overnight bags and a few smaller items. I screw a 2x1 baton across the top section of the partition and place the 15mm ply shelf (i've already cut) on top. I use spirit levels to get the shelf perfect then mark it.
Next job is a ball acher. I have to put another cross piece of 2x1 from one side of the van to the other, to support the front of the shelf. This is done by cutting a small 2x1 rectangler hole in my newly fitted ply sides. I do this perfectly and fit the 2x1 across. The shelf is nail gunned down. BANG BANG BANG BANG... neighbours hate me now.


8. Using office carpet tiles from Focus DIY (£1.98 per tile) I carpet tiled the whole of the load area.


That should be the load area finished. What do ya reckon to that then?
9. Time to carpet the partition in the cabin. Im using car carpet, £6 a roll from my local motor spares shop.


Also using a felt fabric I covered the roof throughout the van and the sleeping area too.
I have carpeted the back panel and I have got a materess from a caravan thats only 2' 2" wide that fits perfectly. I will be fitting a curtain and the matteress tonight so I will post again tmrw with finished pictures of the whole thing.
Thanks for reading.