*NOW BOOKED FOR 2026* Transitmania 17 @ Santa Pod 17th to 19th July 2026 *ALL DETAILS HERE*
our 2 hi cubes!
40 posts
• Page 2 of 3 • 1, 2, 3

![]() by 100ps_drw_hicube » Thu Oct 27, 2005 4:36 pm
by 100ps_drw_hicube » Thu Oct 27, 2005 4:36 pm
someone kindly drove into us last year in the blue van so we had to remove the arch it is a 2 piece plastic construction that is welded  upon removal all but one stud snapped we thought oh well off to fords and get another but at £376 each we bodged the old one back on if anyone out there has one of these hi cubes dont remove the arch unless it is neccesary nightmare to refit with only 1 stud still it is on there solid now will post piccys of panel to be replaced later
-

100ps_drw_hicube - Transit Abuser!!
- Posts: 4118
- Joined: Tue Sep 06, 2005 6:25 pm
- Location: sussex
![]() by Gunslinger » Thu Oct 27, 2005 4:47 pm
by Gunslinger » Thu Oct 27, 2005 4:47 pm
ok i'll keep an eye out for it 
images from the inside would be good too, just incase they changed the build method between what i am used to working on and these newer ones.
one thing i did forget to mentions was "weld through" sealer ... ford love it, those of us having to repair their crappy builds hate it eitherway, you need to get shot of it where you are planning on welding
images from the inside would be good too, just incase they changed the build method between what i am used to working on and these newer ones.
one thing i did forget to mentions was "weld through" sealer ... ford love it, those of us having to repair their crappy builds hate it
-

Gunslinger - Transit Devotee

- Posts: 1720
- Joined: Sun Apr 03, 2005 12:24 pm
- Location: west oxfordshire
![]() by 100ps_drw_hicube » Thu Oct 27, 2005 5:09 pm
by 100ps_drw_hicube » Thu Oct 27, 2005 5:09 pm
cant get pics of inside at the mo as it is fully loaded and i got a sheet of ply screwed over it anyway here is the pics of current panel and the new panel from madvanman oh the bottom isnt very good on the one i got from madvanman so i got a new one


-
100ps_drw_hicube - Transit Abuser!!
- Posts: 4118
- Joined: Tue Sep 06, 2005 6:25 pm
- Location: sussex
![]() by 100ps_drw_hicube » Thu Oct 27, 2005 7:32 pm
by 100ps_drw_hicube » Thu Oct 27, 2005 7:32 pm
not much it is just that i was told it would be easier to replace the whole lot but looking at it i think it would be easier just to do the top half
-
100ps_drw_hicube - Transit Abuser!!
- Posts: 4118
- Joined: Tue Sep 06, 2005 6:25 pm
- Location: sussex
![]() by Luke » Thu Oct 27, 2005 8:07 pm
by Luke » Thu Oct 27, 2005 8:07 pm
I think i'd cut the new side panel in half and fit just the top half!! - join it on the top swage line!! 
Never done it though!!
anyone else i'd be interested to know how a "profesional" would tackle it!!!
Never done it though!!
anyone else
-
Luke - Site Admin
- Posts: 44530
- Joined: Wed Mar 02, 2005 12:53 am
- Location: Rotherham, Yorkshire!!
![]() by 100ps_drw_hicube » Thu Oct 27, 2005 8:11 pm
by 100ps_drw_hicube » Thu Oct 27, 2005 8:11 pm
it was a profesional that told me to replace the whole panel the guy we use for bodywork is a well known guy he paints some of the british touring cars the honda cars mainly 
-
100ps_drw_hicube - Transit Abuser!!
- Posts: 4118
- Joined: Tue Sep 06, 2005 6:25 pm
- Location: sussex
![]() by Gunslinger » Fri Oct 28, 2005 1:09 am
by Gunslinger » Fri Oct 28, 2005 1:09 am
ok, sorry for slow reply, i had a couple of things to do.
nasty place for a problem, i was thinking botton was the problem, ok ....
1) your man is right, if you have a good replacement, then you replace all of it, the one you have there you carefully grind off the welds from the side of the seems not needed, or you use one of those spot weld cutters that cut around the weld and allow you to grind off the leftover later, this will remove the unwanted metal connected to your new panel, then you use a normal drill to drill out the spotwelds in the van (having cut the panel out 10mm inside the seam line all the way around, this will leave you a series of holes to spot weld the replacement panel in with. obviously the top it the oposite way around as you dont want to drill through the rain channel (see below for a reason why you might have to)
for the bottom simply drill through the spot welds on the van and weld the new panel on through the holes from the rear
then line up the replacement panel and weld it in using the holes you drilled to remove the original welds and any extra ones you find you need to add, seal it all up with grey stripe sealant and away you go.
2) if your replacement panel is not good, and cant be straightened to a point you are happy with then you are left with no choice but to replace the bit your not happy with on the new panel, in this case the bottom, and join it at a point that is not flat, ie that swage line ...... question, what is wrong with the bottom on your van ? if nothing, then no point in removing it, only to replace it .... more work than its worth
so, working on the principle that the bottom on your van is good, then you need to decide where to cut it, normally i would be tempted to say go to the lower swage line as it is a smaller section than the upper one and less likely to warp when you weld it, but looking at your replacement panel, i would go for the top one in this case,
3) Take the glass out at this stage as it will prove easier to work with it removed
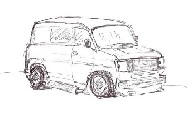
4) i would be looking to cut your van along the line above the side repeater in the picture (it looks missaligned anyway ), at the top of the reccessed piece, cutting off the bend that brings the panel back out from the van, so that looking in profile (from the side) the panel comes up, bends back in towards the van and then bends back to vertical then stops just short of the bend back out (and i do mean close to that bend, not 5mm below it) infact i would be tempted to cut on that bend or maybe even a couple of mm after it, allowing for the thickness of your cutting tool, remember you can always skim a bit off but cant put it back so easy, to cut this you need something that will cut a straight line or close (although this can be straightened later if you errr on the side of caution and leave a little of the bend) an airsaw would be ok, but might be hard to keep straight and also if it catches in the metal it will bend it, a nibbler will not get in tight enough, a 12 inch grinder is just too big, so i would go for a 4 1/2 or 5 inch grinder with a very very thin stainless steel cutting disc (1mm or less) this would be a good compromise, and cut as close to the edges as i can without cutting the frame, and finish it off with a thin hacksaw blade, you might find this actually easier to cut from the inside, especially if your not too steady with the grinder or dislike workigng at odd angles, wear a good set of goggles and face protection and then you can get quite close to it while you are cutting and see better, i use a full facemask with a filter on it from 'Sabre' ... very good
i cant stress how much cleaner a cut you will get with one of these thin stainless steel cutting discs, 100% better than normal cutting discs in my opinion.
5) ok, now cut all the way up the sides to the top 10mm inside the seam line,
that should leave you just the top section left connected
6) cut from the top left of the window frame, up at an angle to the top of your vertical cut on the left, repeat the process on the right, this will remove the bulk of your panel, leaving only the section above the window connected (much easier to work with)
7) now cut 10mm below the rain chanel, all the way from one side to the other, you will now have much easier access to the joints you need to remove.
examine your new panel for how the top section is constructed, i havnt looked too closely at one of your type, but on the mk2 the roof is one panel and actually stops at the outer edge of the rain channel, the section below this (that it is welded to) goes through into the van and forms the C section channel that runs around the top of the van, the side panel folds back at the top by 90 degrees, and is spot welded to the lip on the edge of that C section around the top of your van, producing a 3 layer sandwich along the line of the rain channel, now you have to decide how you are going to re-attach the panel once you have the old one out,
if you opt to remove the leftover edge of the old panel cleanly, then cut or grind the welds as before and drill the top of your replacement panel .... BUT, and here is the problem, you are going to have to mig weld the panel back in place, and you need to make sure you can actually get up there to weld it ..... so the other option (and the one i would go for, mainly because i know i can do it) is to remove the unwanted metal sections on the top of your new panel cleanly leaving no holes in it, then drill out the welds holding the edge of the old panel to the van, drilling all the way through the rain channel :O (if as i suspect, and there is weld through sealant between these panels, then a small pencil blow tourch will be usefull later to burn it out from around the holes so as not to contaminate your weld)
9) now for the sides, and this i am going to be working blind on as you cant get any pictures, but if i am not mistaken, at the joint of each of these side panels, there is not only the lip of each side panel, but also a strengthening rib, so again you are working with 3 thicknesses of metal ... typical ford and a real pain at times, especially if the one you want to remove is sandwiched between the other 2
i will stop there for now as it is hard to consider the best move to make next without seeing the construction of the side panel joints, can you get a shot of the inside of the 'new' panel. showing the joint ??
hope this lot was at least a little help
nasty place for a problem, i was thinking botton was the problem, ok ....
1) your man is right, if you have a good replacement, then you replace all of it, the one you have there you carefully grind off the welds from the side of the seems not needed, or you use one of those spot weld cutters that cut around the weld and allow you to grind off the leftover later, this will remove the unwanted metal connected to your new panel, then you use a normal drill to drill out the spotwelds in the van (having cut the panel out 10mm inside the seam line all the way around, this will leave you a series of holes to spot weld the replacement panel in with. obviously the top it the oposite way around as you dont want to drill through the rain channel (see below for a reason why you might have to)
for the bottom simply drill through the spot welds on the van and weld the new panel on through the holes from the rear
then line up the replacement panel and weld it in using the holes you drilled to remove the original welds and any extra ones you find you need to add, seal it all up with grey stripe sealant and away you go.
2) if your replacement panel is not good, and cant be straightened to a point you are happy with then you are left with no choice but to replace the bit your not happy with on the new panel, in this case the bottom, and join it at a point that is not flat, ie that swage line ...... question, what is wrong with the bottom on your van ? if nothing, then no point in removing it, only to replace it .... more work than its worth
so, working on the principle that the bottom on your van is good, then you need to decide where to cut it, normally i would be tempted to say go to the lower swage line as it is a smaller section than the upper one and less likely to warp when you weld it, but looking at your replacement panel, i would go for the top one in this case,
3) Take the glass out at this stage as it will prove easier to work with it removed
4) i would be looking to cut your van along the line above the side repeater in the picture (it looks missaligned anyway
i cant stress how much cleaner a cut you will get with one of these thin stainless steel cutting discs, 100% better than normal cutting discs in my opinion.
5) ok, now cut all the way up the sides to the top 10mm inside the seam line,
that should leave you just the top section left connected
6) cut from the top left of the window frame, up at an angle to the top of your vertical cut on the left, repeat the process on the right, this will remove the bulk of your panel, leaving only the section above the window connected (much easier to work with)
7) now cut 10mm below the rain chanel, all the way from one side to the other, you will now have much easier access to the joints you need to remove.
if you opt to remove the leftover edge of the old panel cleanly, then cut or grind the welds as before and drill the top of your replacement panel .... BUT, and here is the problem, you are going to have to mig weld the panel back in place, and you need to make sure you can actually get up there to weld it
9) now for the sides, and this i am going to be working blind on as you cant get any pictures, but if i am not mistaken, at the joint of each of these side panels, there is not only the lip of each side panel, but also a strengthening rib, so again you are working with 3 thicknesses of metal ... typical ford and a real pain at times, especially if the one you want to remove is sandwiched between the other 2
i will stop there for now as it is hard to consider the best move to make next without seeing the construction of the side panel joints, can you get a shot of the inside of the 'new' panel. showing the joint ??
hope this lot was at least a little help
-
Gunslinger - Transit Devotee
- Posts: 1720
- Joined: Sun Apr 03, 2005 12:24 pm
- Location: west oxfordshire
![]() by 100ps_drw_hicube » Fri Oct 28, 2005 3:23 pm
by 100ps_drw_hicube » Fri Oct 28, 2005 3:23 pm
have just been quoted £950 to weld new panel in and fit new wing and full respray to ontario blue inc door shuts etc good price or look elsewhere???
have used the guy before so we know he does a good job he reckons about 35 hours work? he said he dont like painting fibreglass as it cracks and doesnt look very good but he has agreed to do it
have used the guy before so we know he does a good job he reckons about 35 hours work? he said he dont like painting fibreglass as it cracks and doesnt look very good but he has agreed to do it
-
100ps_drw_hicube - Transit Abuser!!
- Posts: 4118
- Joined: Tue Sep 06, 2005 6:25 pm
- Location: sussex
![]() by Gunslinger » Fri Oct 28, 2005 3:42 pm
by Gunslinger » Fri Oct 28, 2005 3:42 pm
hhhmmmmm .... tough call
especially as you have had work done by him before and it has been good, i would have said that was a bit on the cheap side, knowing how much work it can be to change that panel and to remove the old wing, then add on top of that the prep work for a full respray and the time to do that, just out of curiosity, what he quote you just for a respray if you fit the wing and side panel yourself ?
btw .... was that + VAT or including,
either way, you might have to consider it carefully, especially if you were going to fork out for a respray anyway, he might have given you a good deal if you have all the work done there
shop around a little on the respray price
as for the welding i wouldnt want to guess at a current price for that on its own as i have been out of touch with the pricing on that type of stuff for a while, all i know is that its one hell of a lot cheaper to do it yourself
-
Gunslinger - Transit Devotee
- Posts: 1720
- Joined: Sun Apr 03, 2005 12:24 pm
- Location: west oxfordshire
![]() by Luke » Fri Oct 28, 2005 4:59 pm
by Luke » Fri Oct 28, 2005 4:59 pm
dont seen a bad price to me!! if you know he does a good job!!100ps_drw_hicube wrote:have just been quoted £950 to weld new panel in and fit new wing and full respray to ontario blue inc door shuts etc good price or look elsewhere???
have used the guy before so we know he does a good job he reckons about 35 hours work? he said he dont like painting fibreglass as it cracks and doesnt look very good but he has agreed to do it
theres probly £300's of paint on a high cube!!
-
Luke - Site Admin
- Posts: 44530
- Joined: Wed Mar 02, 2005 12:53 am
- Location: Rotherham, Yorkshire!!
![]() by 100ps_drw_hicube » Fri Oct 28, 2005 5:06 pm
by 100ps_drw_hicube » Fri Oct 28, 2005 5:06 pm
to be honest i was amazed so i think i will get him to do all the work unfortunately he cant start until 18th of dec as he has a contract to be finished for mclaren (formula 1)
i think the reason it is cheap is cause my dad has known him for years and sends a lot of work his way also it is a cash job so even better
he said to me that he thinks the wing and side panel will take about 10 hours to cut and weld the new in something about lots of spot welds they take the time apparently he said he would have it done in 4 days so not to long off the road either
i think the reason it is cheap is cause my dad has known him for years and sends a lot of work his way also it is a cash job so even better
he said to me that he thinks the wing and side panel will take about 10 hours to cut and weld the new in something about lots of spot welds
-
100ps_drw_hicube - Transit Abuser!!
- Posts: 4118
- Joined: Tue Sep 06, 2005 6:25 pm
- Location: sussex
![]() by Gunslinger » Fri Oct 28, 2005 10:23 pm
by Gunslinger » Fri Oct 28, 2005 10:23 pm
i think i would take him up on the offer, if your dad and him have a business relationship already and he recommends him then that would be good enough for me if it was my old man, go for it.
Gunslinger
and yeah, lot of spot welds, easy to make, pain to remove
Gunslinger
and yeah, lot of spot welds, easy to make, pain to remove
-
Gunslinger - Transit Devotee
- Posts: 1720
- Joined: Sun Apr 03, 2005 12:24 pm
- Location: west oxfordshire
![]() by 100ps_drw_hicube » Fri Mar 03, 2006 7:14 pm
by 100ps_drw_hicube » Fri Mar 03, 2006 7:14 pm
my old hicube sadly missed  if it werent for some rot and the big dent i gave it
  she would still be with me now
anyone seen it? was sold to someone in sheffield is/was black round the bottom quarter

anyone seen it? was sold to someone in sheffield
You only need two tools in life: WD-40 and Duct Tape. If it doesn't move and it should, use WD-40. If it moves and shouldn't, use the duct tape.
-
100ps_drw_hicube - Transit Abuser!!
- Posts: 4118
- Joined: Tue Sep 06, 2005 6:25 pm
- Location: sussex
40 posts
• Page 2 of 3 • 1, 2, 3
Return to Members Transits Gallery!
Who is online
Users browsing this forum: No registered users