This is Connie 1 who sadly became a donor van when her chassis/floorpan disintigrated with rust. Fortunately, I'd had several years good use from her, as she was a well laid out and equipped camper. Having looked at the prices of professional conversions, it was obvious I'd need a lottery win to buy one. So the decision was made
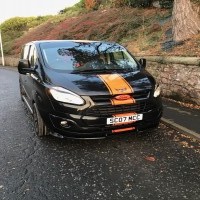
After viewing many over-priced sheds up here, fleabay and a bike trip to Stoke got me the van I wanted, which was, of course, another tranny. An ex patient transport mini-bus, exlwb hi-cube 2.5d with single rear axle.

It has 15" six stud wheels, and as it had a tail lift, I'm lead to believe the rear springs are heavy duty. She does sit higher than my old van, which will be handy as we often follow forestry roads to get to some really amazing camp spots.

I ran the van until April 08, just doing bits and bobs,then she was sorned for the build to begin. The old van had been stripped and weighed in,as I did not have room for two vans.
Since the dimensions of the two vans were different, I decided to use all the fittings and build new cabinets to fit them in. I took the cooker, oven, sink, fridge, Zig unit, 240v system, leisure battery, wooden doors, status aerial, light fittings, captains seat, sky light, cushions and loads of other bits and bobs that could come in handy.
Sorry there's few pics of the earlier part of my build, I only recently found this site, but I'll try to quickly fill you in.
April:
Lined floor with 6mm ply on top of original as the seat mountings left gaps when removed


Run wires for 12v and 240v, Tetrasealed and insulated behind inner panels, using bubble insulation and rockwool. Installed 240v breaker and Zig unit.


Before insulating the roof, I cut all the holes and fitted vents, removed the big orange light
and fitted the status aerial.


All the vents have a wooden frame to "sandwich" fit them with plenty of silicon waterproof sealer. No leaks so far


Before replacing the roof panels, I fitted a set of lights x10 for use when hooked up to 240v. I got them from b&q and they come with a 240/12v converter. I connected them by discarding the converter, and using the original wiring for rear interior lights. They do work directly off the battery,but I only use them when hooked-up or the engine running as they pull a lot of power.

Then I had to cut more holes in the side for gas locker, fridge vent and 240 hook-up.

A local welder knocked up a sturdy metal box for the gas locker, big enough to take two small gas bottles. One Calor and one Macgas as it gives you more supplier options when in remote areas. You only need to swap regulators.

Cut drop hole in locker floor.

May:
Tinted two windows and built toilet cubicle from 12mm ply


Built cabinet to house sink, cooker and oven and tiled the top.


fitted tap, whale pump and waste outlet

Ran gas pipe for cooker oven and fridge.

June:
fitted captains seat and installed battery monitors in dash


All was going well with the build till this:

Became this...,

on my way back from the Farmyard bike rally in June 08. Amazingly, I walked away from this with no broken bones!! I did however knacker my left shoulder and both bloody thumbs! which meant I could hardly hold a pint, never mind a drill.So nothing much happened till after Christmas when money and use of limbs returned.
I'll continue with this post when I get more time