*NOW BOOKED FOR 2025* Transitmania 16 @ Santa Pod 11th to 13th July 2025 *ALL DETAILS HERE*


Keeping 1996 Mk5 alive

This forum can be used to update other members on your progress with your Transit.

Keeping 1996 Mk5 alive

Postby maciejd » Sun Apr 26, 2009 2:53 pm

Hello

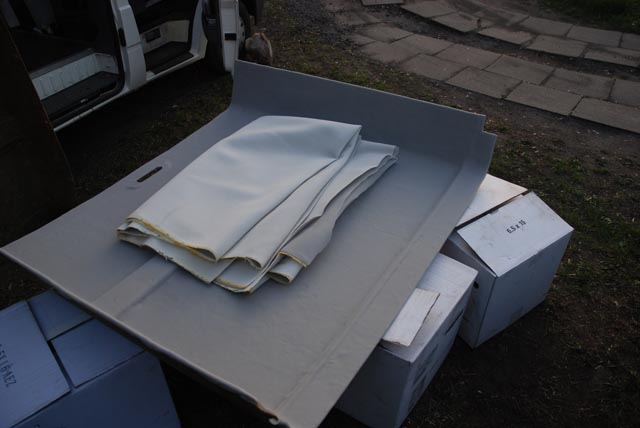
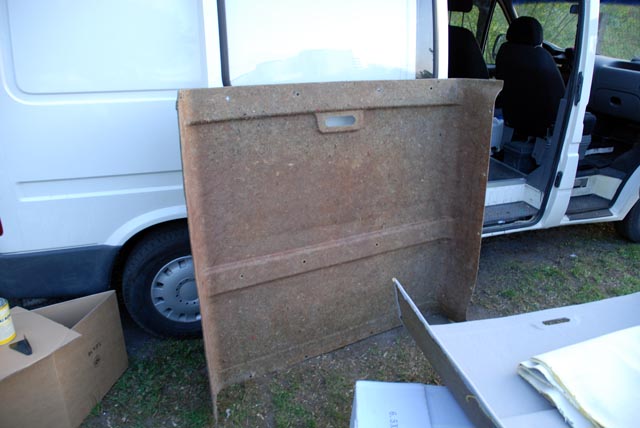
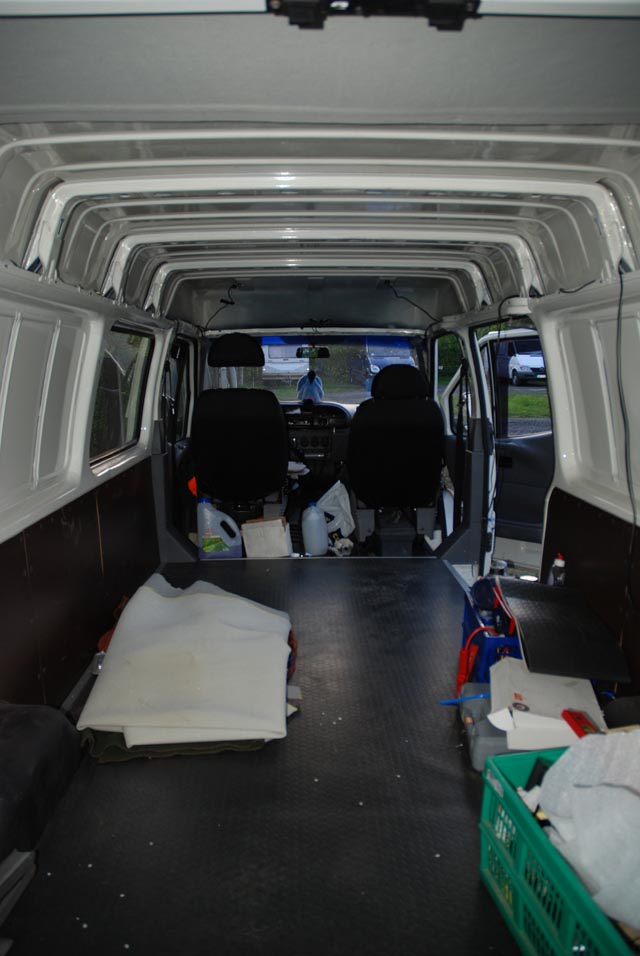
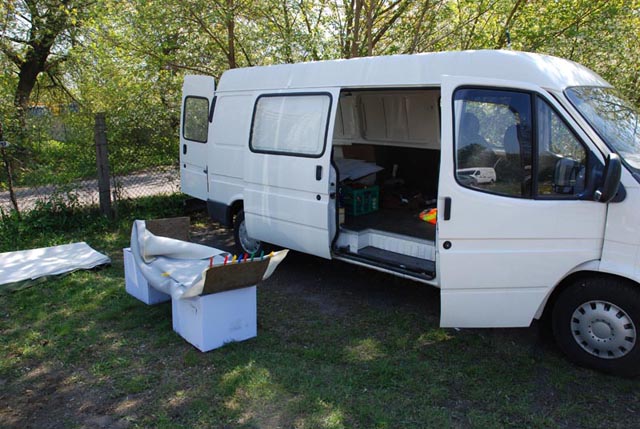
Today I decided to do some finishing in my Tranny. Few months ago I bought an original ceiling material. It's very hard to find one in Poland, especially for LWB Trannys so when I found one pretty cheap (about 50 EUR) the condition of it wasn't most important. It was in bad shape and 3 attempts to clean it was not successful.
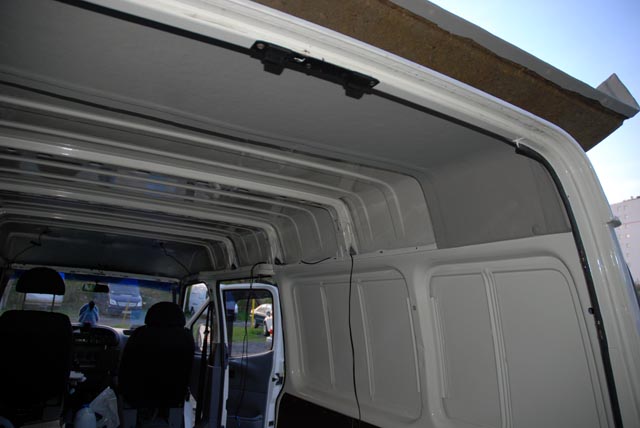
I decided to to restore it so ripped the material. It was on December so the weather stopped me for any further work. Gluing it at home was not acceptable so I mounted celing finishing segments again to get back to them in the Spring.
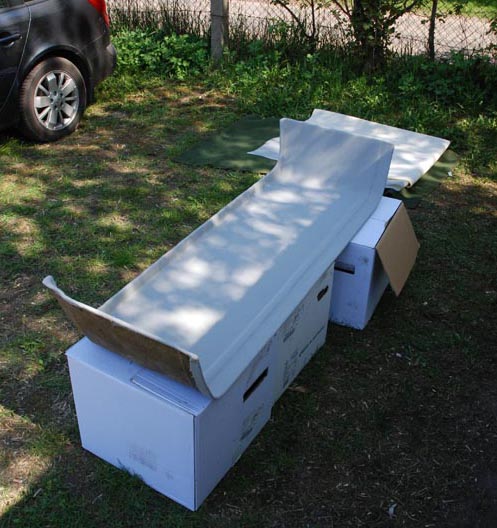
Today I took the last, smallest segment, some glue (the name will not tell you anything as it seems to be local Polish product).. some glue ? 2 cans, 1kg each one ;) and special material which I bought to see how it will be going.
I was hoping 2kg of glue will last for all job, but... the smallest part of the ceiling get approx 0,8kg of glue. This is because when you rip the material, most of the skeleton is like a paper mixed with canvas... I don't know how to describe it, but it absorbs glue easily.

In first step I cut the new canvas with quite big margin. I used washing clips to keep it in place.

Image

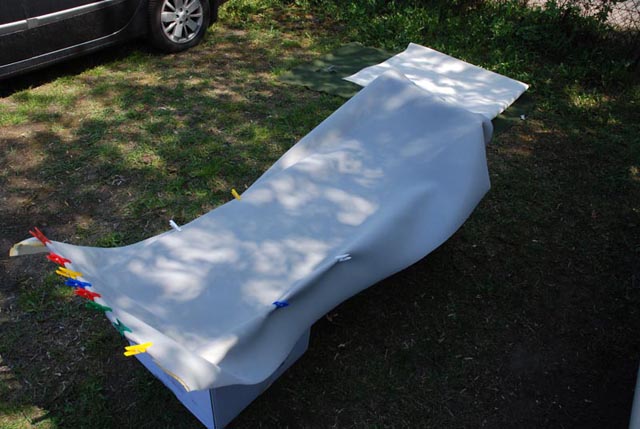
The idea was to glue one half of it and the secend one next, just to avoid moving the material.

Image

Image

I used a 10 cm painting roller dedicated for varnish and a second, bigger one (20 cm) to smooth out the canva.
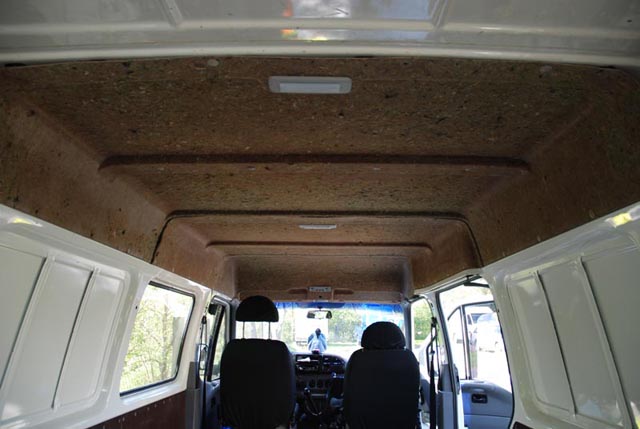
The hardest thing to do was in the corners. Another story is that after ripping the old canva the skeleton wasn't plain and there are small hills and holes. Generally it is not so bad, much better than the old one was - dirty and with holes ripped out ;)

Image

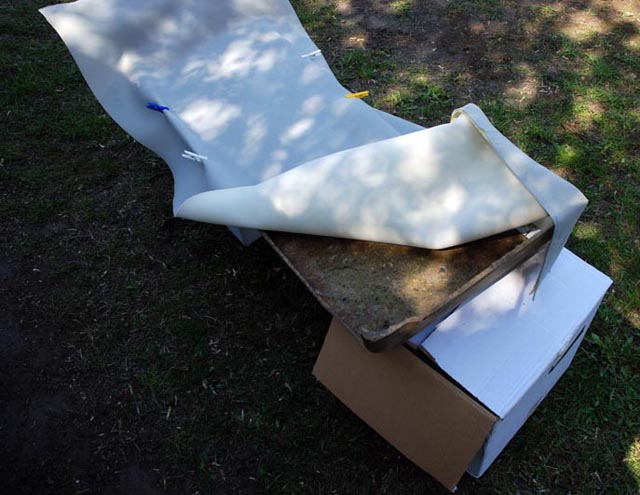
Here you can see it is not superb - where the sun is falling you see the clots. Probably when I put it into the tranny it will be not such visible.

Image

For sure it will be not like new one from the factory, but keep finger crossed the rest will be not harder to glue and the effect will be not much worse than on the smallest segment :)

Image

Will update the thread when I finish the rest.
Last edited by maciejd on Sun Apr 26, 2009 9:12 pm, edited 2 times in total.
regards, Maciej
It's not about driving a van. It's about Ford Transit.
1996 FT Van, 525 000 km - restoration / progress report topic
2004 FT Euroline, 150 000 km - progress report topic
2008 Renault Clio, 40 000 km
2011 Renault Laguna, 90 000 km
User avatar
maciejd
Transit Aficionado
Transit Aficionado
 
Posts: 176
Joined: Tue Mar 17, 2009 10:58 am
Location: Warsaw, Poland

Re: [MK5] 1996 LWB MR interior refresh

Postby dingdangdo » Sun Apr 26, 2009 3:02 pm

thats one tidy looking van Maciej :wink: what plans have you for it?
User avatar
dingdangdo
Transit Devotee
Transit Devotee
 
Posts: 551
Joined: Sun Jan 11, 2009 10:15 pm
Location: Chesterfield

Re: [MK5] 1996 LWB MR interior refresh

Postby maciejd » Sun Apr 26, 2009 4:03 pm

It's third car in the family, so after 10 years in construction company it's retired now. Will be useful when I start building home. For last 12 months it's used for... taking care of him. You know - rust, engine, small little ugly things which has broken long time ago and now it's time to repair them.
As - despite the rust areas - it's rather immortal and the engine is in a very good condition (piston rings replaced, absolutely no problem starting even on -15 C deg, still able to run 85 mph without any problems), it will be a household little truck. Maybe I'll buy a yacht some day... then my 76 angry hamsters will have something for towing ;)
Whatever - it will never be a commercial van again :) Just thinking - as the last bodywork repair was not so professional - how to keep the body in good condition as I want to keep the van as long as it will be able to run but the rust is my nightmare. I'm afraid next year I'll have to replace most of panels (especially these not visible) and do a complete sanding out and repainting. This will be not cheap as I'm not able to do it myself :(

The same Transit in May 2008 :)
Image
Image
Image
regards, Maciej
It's not about driving a van. It's about Ford Transit.
1996 FT Van, 525 000 km - restoration / progress report topic
2004 FT Euroline, 150 000 km - progress report topic
2008 Renault Clio, 40 000 km
2011 Renault Laguna, 90 000 km
User avatar
maciejd
Transit Aficionado
Transit Aficionado
 
Posts: 176
Joined: Tue Mar 17, 2009 10:58 am
Location: Warsaw, Poland

Re: [MK5] 1996 LWB MR interior refresh

Postby Breakdown Biker » Mon Apr 27, 2009 6:03 am

Hi maciejd, glad to see you are getting on with the interior now the weather is better. :D If you need to protect the van from rust you could try using Rustoleum paint. Take a look at noobriders "Mk5 Camper project-1st time transit owner" and you will find links on how to do it your self. It is also not too costly :D
Where would ya be without a can of W.D?

Mk5 hicube minibus camper conversion
viewtopic.php?f=58&t=43816
User avatar
Breakdown Biker
Transit Aficionado
Transit Aficionado
 
Posts: 423
Joined: Fri Mar 20, 2009 6:08 pm
Location: Cumbernauld, Glasgow

Re: [MK5] 1996 LWB MR interior refresh

Postby maciejd » Mon Apr 27, 2009 7:59 pm

Breakdown Biker wrote:If you need to protect the van from rust you could try using Rustoleum paint. Take a look at noobriders "Mk5 Camper project-1st time transit owner" and you will find links on how to do it your self. It is also not too costly :D

Thanks, will do :)

Today I made two next sections. Unfortunatelly the sun gone down and there is still the last one to be done - that middle section profiled for sliding doors upper rail - I'll do it tommorow.

My todays workshop :)
Thanks God I do not have to use my Tranny tommorow - considering almost 3 kg of glue I used so far I would have fun driving it like never before ;)

Image

The second (counting from the back) section is done. As you can see I bought more canvas I'll need. That's my first job like this so I didn't know what to expect and what can happen :)

Image

The "door" one is still waiting and will wait till tommorow.

Image

I can't wait the ceiling will be finished. Then the interior will become more cosy I think. For many years (since we bought the Tranny as almost brand new - it had 11 months then) it has only the ceiling finishing over driver head. Originally there was a bulkhead mounted and only one side window on the sliding doors. Right after purchase we added second side window oposit to sliding doors, disassembled the bulkhead and added 6 back seats (front ones from Fiesta, now waiting to be renovated, but only 3 will be mounted back in Tranny).

Image

The panel I glued yesterday is already on place :)

Image

And last but not least :) New feature I added today also. It gives at least 20 extra HP ;) But to be serious - how many times when you were to hit breaks you looked into the mirror thinking "my God, I hope the driver behind is seeing my stop lights" ? :)
I added extra third one :)

Image

Image
regards, Maciej
It's not about driving a van. It's about Ford Transit.
1996 FT Van, 525 000 km - restoration / progress report topic
2004 FT Euroline, 150 000 km - progress report topic
2008 Renault Clio, 40 000 km
2011 Renault Laguna, 90 000 km
User avatar
maciejd
Transit Aficionado
Transit Aficionado
 
Posts: 176
Joined: Tue Mar 17, 2009 10:58 am
Location: Warsaw, Poland

Re: [MK5] 1996 LWB MR interior refresh

Postby DEE 2009 » Tue Apr 28, 2009 10:53 pm

LOOKS WELL YOU VE DONE A GREAT JOB

WHATS THE NAME OF THE MATERAIL YOU USED TO COVER IT AND WHERE CAN YOU GET IT
DEE 2009
Transit Fan
Transit Fan
 
Posts: 17
Joined: Thu Apr 16, 2009 8:59 pm
Location: BELFAST N.IRELAND

Re: [MK5] 1996 LWB MR interior refresh

Postby neilc5023 » Wed Apr 29, 2009 9:07 am

top job pal im embarking on a simalar job soon might just buy a tourneo though to bust up i have a swb low roof. :D
neilc5023
Transit Devotee
Transit Devotee
 
Posts: 574
Joined: Tue Feb 10, 2009 10:39 pm
Location: blackburn lancashire

Re: [MK5] 1996 LWB MR interior refresh

Postby maciejd » Thu Apr 30, 2009 3:16 pm

DEE 2009 wrote:LOOKS WELL YOU VE DONE A GREAT JOB
WHATS THE NAME OF THE MATERAIL YOU USED TO COVER IT AND WHERE CAN YOU GET IT

Hmmm. Hard question :) This is material dedicated for car ceiling finishing. This is simple canva with a sponge padding. I thik it has no a special name, just look for material for car ceiling finishing. In the shop in Warsaw (Poland) where I bought it there was a lot of patterns and colours. these are made in 140 cm width and 170-180. I took 180 cm version and this is just the size for Transit middle-roof. about 1,5cm left each side so I could scroll (is this a proper word ?) it on the not visible part of the skeleton.
The biggest problem is in corners where the skeleton bend. You are to put some more glue there to instantly glue tight material but you cannot press it too strong - then the glue will seep through it and it looks bad. In the effect in some points (in my case) the new material do not adhere tightly to the skeleton but for me it's fully acceptable, looks much better than old, dirty and tattered finishing.
neilc5023 wrote:top job pal im embarking on a simalar job soon might just buy a tourneo though to bust up i have a swb low roof.

Yeah, finding Tourne for low-roof SWB is easy job. In Poland there is very few Tourneo and if there is one, it costs two time more than a normal Transit van. I saw only two LWB Tourneo in Poland - one was still running and the owner even didn't wanted to sell it. The second one was at scrappy but totaly smashed by a big truck and partially burnt.
To be honest Transit is my hobby so finishing it with own hands gives me much more joy than buying ready parts :)
regards, Maciej
It's not about driving a van. It's about Ford Transit.
1996 FT Van, 525 000 km - restoration / progress report topic
2004 FT Euroline, 150 000 km - progress report topic
2008 Renault Clio, 40 000 km
2011 Renault Laguna, 90 000 km
User avatar
maciejd
Transit Aficionado
Transit Aficionado
 
Posts: 176
Joined: Tue Mar 17, 2009 10:58 am
Location: Warsaw, Poland

MK5 1996 LWB - rebuilding front chassis members

Postby maciejd » Fri May 13, 2011 8:56 pm

Hello Everyone!

I was writing about my 1996 Transit here before:
viewtopic.php?f=6&t=42077 - introduction
viewtopic.php?f=27&t=44657 - interior ceil lining repair
viewtopic.php?f=15&t=64028 - some photos

Last year I also decided to make the life of my Transit longer and the rear chassis members were rebuilt, cleaned and painted. I haven't time then to take photos of the progress. It took 2 weeks, cost hell lot of money but now I sleep well I'll not see the rear springs inside the body ;)
The only memento that left is some photos how the chassis looked like: http://www.afol.pl/transit/ruda_malpa/

This year it's time for the front. Not an easy task considering the front suspension and budget. I'm not able to do these things myself, so have to engage workshop.
Some photos from the last few days at the garage. Sorry for the quality, taken with poor light and with mobile phone camera.

Let's dance... sorry, lift the Tranny.
Image

Front right chassis member. Definitely highest time to make it look better. If you look closer, above the suspension cross member, behind the break hose there was a plate welded few years ago to make it stronger a little bit. Now it will be completely removed and new 2,5mm steel profile welded in.
Image

The left one is much better. It always was less rusty, but now the rust is showing up almost everywhere. The van is in too good overall condition to loose the chance of preserving it because of ignoring the stupid rust.
Image

Right member is being cut off. It's rusty, but there is no tragedy. Maybe it could work for another 2 years. I want to use it longer.
Image

The section under passenger seat is already done and welded in:
Image

The left side is also almost ready, however not painted with the base yet.
Image

Image

The left side is being cut also. Going to front of the Tranny. Sometimes the original steel with rust in-between is 1cm thick.
Image

At the same time the suspension goes down and right member is being cut out partially. We have to unbolt and raise the engine. Better access to the member will be from the engine bay. The wheel housing will not disturb.
Image

The left is also ready to be ripped out :)
Image

Cripsy leftover :) I hate rust...
Image

Image

It also good to replace some things at the time the suspension is off. Brand new shock absorbers and upper mountings, break hoses, lower suspension arm ball joint etc.

Image

That's all for now.

What left to do: finish the rebuilding of chassis members, front belt, some minor rust repairs around front wheels, especially cross members right behing them, putting everything together.

I hope the whole play will extend the life of the car.
regards, Maciej
It's not about driving a van. It's about Ford Transit.
1996 FT Van, 525 000 km - restoration / progress report topic
2004 FT Euroline, 150 000 km - progress report topic
2008 Renault Clio, 40 000 km
2011 Renault Laguna, 90 000 km
User avatar
maciejd
Transit Aficionado
Transit Aficionado
 
Posts: 176
Joined: Tue Mar 17, 2009 10:58 am
Location: Warsaw, Poland

Re: MK5 1996 LWB - rebuilding front chassis members

Postby maciejd » Tue May 17, 2011 6:27 pm

And another update. The right one is almost done, the front mounting point only left.

Image

From the engine bay side the front part doesn't look so bad. Under the engine mointing point it's even mint :D

Image

And some thoughts from another thread (viewtopic.php?f=4&t=89246). The question is: is it better to use thinner member profiles and double them to spread the load/stress in welding points or it's enough to use thick steel?
From what the workshop answered:
- the factory gives thinner steel and double layers point-welded every few cm because this is more lightweight than single thick profile;
- line welding is much more hardy than these single original weldings;
- they can put some inner or outer profiles to spread the load but... then after 3-4 years I'll be not able to apply the corrosion protection inside and the rust will appear inbetween the profiles like it appeared now;
- the single profile solution has the same strenght (or even better) than the factory but is much more heavier and this is why the factory don't use such technology;
- with the inspection holes I'll be able to successfuly protect members inside and there will be no spece between profiles I can't get access to.

Sounds logically but I'm not sure if this is correct.

Can anyone with experience on welding comment on that, please? Then I'll have a chance to change / correct some things.
regards, Maciej
It's not about driving a van. It's about Ford Transit.
1996 FT Van, 525 000 km - restoration / progress report topic
2004 FT Euroline, 150 000 km - progress report topic
2008 Renault Clio, 40 000 km
2011 Renault Laguna, 90 000 km
User avatar
maciejd
Transit Aficionado
Transit Aficionado
 
Posts: 176
Joined: Tue Mar 17, 2009 10:58 am
Location: Warsaw, Poland

Re: MK5 1996 LWB - rebuilding front chassis members

Postby the_big_fact_hunt » Tue May 17, 2011 8:24 pm

very nice job there mate.
When you glued the cloth to the panel you could have tried painting it with a mixture of PVA glue and water, it could have prevented the glue being absorbed so easily
Solve the World food problem.......... Feed the homeless to the hungry

2012 115T350
User avatar
the_big_fact_hunt
Transit Fanatic
Transit Fanatic
 
Posts: 2060
Joined: Tue Feb 12, 2008 1:02 am
Location: Nottingham

Re: MK5 1996 LWB - rebuilding front chassis members

Postby maciejd » Wed May 18, 2011 6:17 am

the_big_fact_hunt wrote:very nice job there mate.
When you glued the cloth to the panel you could have tried painting it with a mixture of PVA glue and water, it could have prevented the glue being absorbed so easily

Thanks. The other idea I got during the job was to use a spray glue, wait until it dry and then use final glue spread with roller. However this will be time consuming (my time ;) ) so the decision was to use as much glue as it's needed and just left windows open for a couple of days (use the time of the van this way ;) ) :)
regards, Maciej
It's not about driving a van. It's about Ford Transit.
1996 FT Van, 525 000 km - restoration / progress report topic
2004 FT Euroline, 150 000 km - progress report topic
2008 Renault Clio, 40 000 km
2011 Renault Laguna, 90 000 km
User avatar
maciejd
Transit Aficionado
Transit Aficionado
 
Posts: 176
Joined: Tue Mar 17, 2009 10:58 am
Location: Warsaw, Poland

Re: MK5 1996 LWB - rebuilding front chassis members

Postby transitandy » Tue May 24, 2011 9:12 pm

very nice work m8y :)
TRANSIT M8, SAY NO MORE YOUR IN...... FORD THROUGH TO THE BONE......
User avatar
transitandy
Transit Extremist
Transit Extremist
 
Posts: 17754
Joined: Fri Nov 30, 2007 1:10 am
Location: Essex...

Re: MK5 1996 LWB - rebuilding front chassis members

Postby maciejd » Thu May 26, 2011 6:28 am

And the last part of chassis members - finish! :)

Right one painted, put together and protected.
Image

The left one is painted...
[img]http://www.afol.pl/transit/podluznice_przednie/018_left_one_painted.jpg[/jpg]

... and all the bits put together and protected
Image

The van is on the road again and going straight! :)

I also checked the geometry and it doesn't look so bad after slight correction:

Left front:
Camber: -0 deg 44' [marked as yellow - new shock absorbers? :)]
Caster: 1 deg 05' [marked as red, probably the uderframe is not fitted back as it need to be]
Toe: 0 deg 01' [green]

Right front:
Camber: 0 deg 53' [marked as yellow - new shock absorbers? :)]
Caster: 1 deg 07' [marked as red, probably the uderframe is not fitted back as it need to be]
Toe: 0 deg 01' [green]

Total toe: 0 deg 03' [green]
Steer ahead: 0 deg 00' [green]

I'll ignore the caster - it's almost the same on both sides and fixing it might be not worth the effect.

Not so bad regarding the condition of Polish roads I think.

What's next?
Cleaning it up, looks horrible after 3 weeks in the workshop.
I also want to re-register it from 8 seats to 5 and put original triple seat as the second row.
Further steps - front member, front wheel arches, front light panels, but for now it's not a tragedy.

Hugh... at least few more years on the road :)
regards, Maciej
It's not about driving a van. It's about Ford Transit.
1996 FT Van, 525 000 km - restoration / progress report topic
2004 FT Euroline, 150 000 km - progress report topic
2008 Renault Clio, 40 000 km
2011 Renault Laguna, 90 000 km
User avatar
maciejd
Transit Aficionado
Transit Aficionado
 
Posts: 176
Joined: Tue Mar 17, 2009 10:58 am
Location: Warsaw, Poland

Re: MK5 1996 LWB - rebuilding front chassis members

Postby maciejd » Sat Jun 04, 2011 3:03 pm

Today it was a time of cleaning. After 3 weeks at workshop there was a rusty dust everywhere. Claps for everyone who would be so brave and got inside in a white shirt ;)

Washed outside (with a wax, nothing like automatic tank station carwash, everything by hand), cleaned whole interior, seats are also washed. Almost all door seals were cleaned. I also unblocked all the water holes in steps and the side door bottom rail.

Lots of work, something like 6hrs in total, but it was worth it :) Now it's a pleasure to get inside and drive. Even the noise seems to be lower than usual ;))

Image

Image

Image

Image

Image

Image

Next steps:

- put extra 7 or 10 mm bubble-rubber under the front carpet;
- put dynamat on the side walls (or something another what will be a hydrophobe and soundproof, maybe the same bubble-rubber I'll put in front on a floor);
- mount a towing hook;
- mount second row of seats and seatbelts (original ones).
regards, Maciej
It's not about driving a van. It's about Ford Transit.
1996 FT Van, 525 000 km - restoration / progress report topic
2004 FT Euroline, 150 000 km - progress report topic
2008 Renault Clio, 40 000 km
2011 Renault Laguna, 90 000 km
User avatar
maciejd
Transit Aficionado
Transit Aficionado
 
Posts: 176
Joined: Tue Mar 17, 2009 10:58 am
Location: Warsaw, Poland

Next

Return to Members Transit's - Progress Reports!


Who is online

Users browsing this forum: No registered users

This site contains affiliate links for which we may be compensated.