*NOW BOOKED FOR 2026* Transitmania 17 @ Santa Pod 17th to 19th July 2026 *ALL DETAILS HERE*


Johny Transits Mk5 Transit - Camper/Day #2

This forum can be used to update other members on your progress with your Transit.

Johny Transits Mk5 Transit - Camper/Day #2

Postby johny transit » Sat Feb 26, 2011 2:47 pm

My old MK3 had been a brilliant bus - I fitted it out as a day van, and had been on many trips in it over the seven years that I owned it, but I felt it needed to go into "dry dock" for a few months for a good overhaul, which was not something I could do as I have nowhere off road to work. I live in quite a nice area and with the van parked on the street I can just about get away with making up interior panels, wiring things up - even cutting holes for windows, but I wouldn't fancy getting real tools out - angle grinders and welding etc - so for me a younger van in good condition but in need of kitting out was the answer.
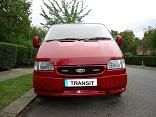
I got the new van on 16th October 2009 - I had been looking for ages - pretty much since I had found out about the DOHC engines in fact (it really had to be a petrol for me as I find the diesel too noisy, but these vans are rare, and trying to find one in good condition is virtually impossible). Anyway, the van I had settled on was an ex cid surveillance van, in "Garnet" Red, bought from a bloke in Dagenham. With no service history and 100k on the clock it wasn't ideal, but it was very clean and original, and as I have not to this day seen a better one, I am happy enough.
The van has two side loading doors - a feature which I really like - although of course it meant re thinking my interior plans to suit. Also it has the one piece tailgate which I really didn't want. I like to have the spare wheel mounted on a rear door for ease of access and a custom look - plus leaving the original spare wheel carrier free to one day hold an lpg tank! I have recently aquired a swing away wheel carrier from a Toyota Surf, but it is gonna take some re engineering, anyway, on with things...
Here is the van as I got it...

Image

The first thing I did was to change the indicators to clear ones...

Image

Although the van had been boarded out with good thick ply, and carpeted in black cord, it was not really up to my standard (lots of holes from equipment mountings etc) so I set about cutting some nice new panels out of the thinest ply I could find (3.4mm?)...

Image

The floor was good and I could use that, but there were a few curious holes in it which had metal plates over them (hopefully not policemans excuse me's!). I took these up and chisselled the floor so that the plates would sit flush so as not to show through the carpet I was going to lay...

Image

Image

I actually fitted the two side windows into both sld's after I had lined out the van, here they are going in...

Image

Image

I had brought the rear bench seat/bed from the other van, so once I had panelled and carpeted the rear, I fitted it in with a little adjustment...

Image

Image

Image

The cooker unit from my last van fits in good in its new location, althouth there is room to do two little cupboards iether side when I get the chance...it is also going to have a pumped tap for the sink with 25 litre water container prolly behind passenger seats...

Image

Next I managed to get hold of the seats, carpet, door cards, electric window mechanisms, gear stick and hand brake boots from a Tourneo, but on taking out my two single seats found that the rubber matting was soaked through underneath, which was a great pity as the previous owner had gone to the trouble of painting the floor black, then sticking down bitumen sheeting (the flashing strip stuff I think). Unfortunately he had failed (or not bothered) to find the source of the water ingress, and voids between the bitumen and floor were all holding water...

Image

There was nothing for it but to rip up all the bitumen (which for the most part came off cleanly taking the black paint with it)...

Image

I got all the floor cleaned up - thankfully no real rust damage...

Image

So a good coat of hammerite (or the sh"ty Leyland equivalent) and the floor was looking much the same as before I started - well silver anyway...

Image

I'd like to relay some bitumen stuff for the sake of soundproofing but decided to just fit the cab carpet straight over for now, along with its thick soundproofing mat that goes underneath (but curiously Ford only saw fit for the mat to come half way back). I will wait and see if my efforts to waterproof the cab (there's a thread on here somewhere) have been successful or not before doing anything too permanent.

And here we are with all the Tourneo luxuries fitted...

Image

Image

Well, after a long rainy autumn and winter, I have to say that the cab floor is bone dry :)
Here's what I did to try and stop the water leaking in - it seems as though it was getting in through some holes kindly provided during manufacture. Firstly, into the engine bay which is prolly the cause of battery tray/suspension tops/front wheel arch rot, and then from there somehow into the cab footwells. So maybe there are other leaky spots elewhere, but this certainly did the trick...

Before...

Image

Image

After...

Image

Image

I refitted all the 240v hook up stuff from my last van, this is a good place for the mains socket...

Image

Image

And of course, what day van would be complete without a rear ladder?

Image

Image

I had quite a struggle with the curtains, trying to decide whether the rear ones should be fixed to the door or to the inside of the van, plus the side windows don't have much clearance for poles etc when the doors are pulled open. But in the end this is what I did... the material is a bit thick but good for keeping light out anyway, just some tie backs to sort out.

Image

Image

Image

I really fancied some led mood lighting, so a couple of battery powered led xmas light strings from John Lewis were re configured. I researched this quite carefully as I wanted the leds to be in series as far as possible in order to run most efficiently. In the end I used current regulator ic's, with groups of four reds in series, and 2 whites in series in parallel with two other whites in series. This divided out nicely into the three ceiling boards so that the wiring was not too much of a hassle. I juggled the resistors so that the reds were running pretty hot (21ma) and the whites less so, so that the brightnesses looked about equal.

Image

Image

I've also changed the mirrors to electric.

Next are some AEZ wheels...

Image
Last edited by johny transit on Sat Feb 26, 2011 3:17 pm, edited 2 times in total.
"There's always a way"
johny transit
User avatar
johny transit
Transit Devotee
Transit Devotee
 
Posts: 729
Joined: Wed Apr 23, 2008 7:33 pm
Location: North London

Re: Johny Transits Mk5 Transit - Camper/Day #2

Postby G40GES » Sat Feb 26, 2011 3:04 pm

top job Johny... hope the old mk3 goes well also :wink:
Gadge in the shed... STILLfreezing me bits off...
G40GES
Transit Devotee
Transit Devotee
 
Posts: 1190
Joined: Sun Aug 01, 2010 8:44 pm
Location: newmarket

Re: Johny Transits Mk5 Transit - Camper/Day #2

Postby dirtydog » Sat Feb 26, 2011 4:27 pm

Nice work there Johny, what esle you got planned for it?
2006 Mk7 115 350 lwb, med high top
2006 Mk7 110 350 lwb, high top camper
User avatar
dirtydog
Transit Extremist
Transit Extremist
 
Posts: 5696
Joined: Wed Feb 17, 2010 5:56 pm
Location: Haslemere, Surrey

Re: Johny Transits Mk5 Transit - Camper/Day #2

Postby Luke » Sat Feb 26, 2011 9:45 pm

very smart van mate 8) and quality work too 8) 8)

couple of q's how does the back seat/bed secure when it's sat up as a seat :?: just i'm going to copy the idea for my grey van :D

and the other q. where are the front alloys :P :lol: :lol:
User avatar
Luke
Site Admin
 
Posts: 44561
Joined: Wed Mar 02, 2005 12:53 am
Location: Rotherham, Yorkshire!!

Re: Johny Transits Mk5 Transit - Camper/Day #2

Postby rover » Mon Feb 28, 2011 11:42 am

Nice work mate 8)
User avatar
rover
Transit Extremist
Transit Extremist
 
Posts: 6397
Joined: Mon Nov 21, 2005 12:03 am
Location: Nottinghamshire

Re: Johny Transits Mk5 Transit - Camper/Day #2

Postby madmark » Mon Feb 28, 2011 2:30 pm

looking very good :wink:
madmark
Transit Extremist
Transit Extremist
 
Posts: 15467
Joined: Thu Mar 03, 2005 4:29 am

Re: Johny Transits Mk5 Transit - Camper/Day #2

Postby SteveDSD » Mon Feb 28, 2011 3:33 pm

Great van, great job, thanks for sharing your pics.
2000 SWB 100-Campervan/Dayvan/Moneypit
Image See the van at http://www.fordtransit.org/forum/viewto ... 58&t=44950 Image
User avatar
SteveDSD
Transit Aficionado
Transit Aficionado
 
Posts: 199
Joined: Thu May 25, 2006 1:21 pm
Location: North West UK

Re: Johny Transits Mk5 Transit - Camper/Day #2

Postby redcube » Mon Feb 28, 2011 5:01 pm

top job love the mood lights
My camper van conversion viewtopic.php?f=58&t=76200
If any thing falls of will you mind picking it up for me
User avatar
redcube
Transit Devotee
Transit Devotee
 
Posts: 1589
Joined: Mon Aug 16, 2010 8:48 pm
Location: Co. Clare, Ireland right by the sea

Re: Johny Transits Mk5 Transit - Camper/Day #2

Postby peter1975 » Mon Feb 28, 2011 5:06 pm

nice looking van that top work 8) 8)
if aint broke still fix it
peter1975
Transit Devotee
Transit Devotee
 
Posts: 559
Joined: Sun Aug 15, 2010 5:38 pm
Location: bilston west mids

Re: Johny Transits Mk5 Transit - Camper/Day #2

Postby johny transit » Wed Mar 02, 2011 12:35 pm

Thanks for the positive comments!

Luke - the back of the bed hinges up, then I prop it with two metal poles that just go into partly bored holes both on the support rail (of when it's lying flat) and the back edge of the bed/rear seat. For some reason, if I have it up like that it all bounces loose when going over speed humps (didn't on the old mk3 though) so I wouldn't use this method - infact will be looking to improve it with something that locks in, maybe with some bolts and wing nuts.

Still planned : Custom front bumper and colour code with side skirts or side bars. Tint cab windows. Finish off various bits of electrics. Build in the sat nav. Reversing sensors. Spare wheel rear mount. Fog lights. Table. Connect sink waste (!). Oh yeh, and get those wretched 15" alloys on.
"There's always a way"
johny transit
User avatar
johny transit
Transit Devotee
Transit Devotee
 
Posts: 729
Joined: Wed Apr 23, 2008 7:33 pm
Location: North London

Re: Johny Transits Mk5 Transit - Camper/Day #2

Postby johny transit » Mon Mar 14, 2011 7:38 pm

Well finally I managed to get the hubs off, counter bore them and refit with allen bolts...

Image

And after changing the pads and shoes while I was at it, I finally got those 15" AEZ's on...

Image
"There's always a way"
johny transit
User avatar
johny transit
Transit Devotee
Transit Devotee
 
Posts: 729
Joined: Wed Apr 23, 2008 7:33 pm
Location: North London

Re: Johny Transits Mk5 Transit - Camper/Day #2

Postby madmoggy » Mon Mar 14, 2011 9:01 pm

Nice van, coming along a treat,great work.
madmoggy
Transit Addict
Transit Addict
 
Posts: 58
Joined: Wed Jan 05, 2011 10:32 pm

Re: Johny Transits Mk5 Transit - Camper/Day #2

Postby johny transit » Wed Apr 06, 2011 8:17 pm

Well I have (as most of you will know from my frequent questions) been doing a few more things on the van lately.
One thing I really wanted to do was finish off the requirements for changing the v5 to Camper Van, hopefully in time for this years Insurance - so I got the tap working...

Image

...and found a way to have a little table with fixings to the van...

Image

...it's runners are made from an Ikea extending curtain pole and they just pull out from the cooker unit. Not massively strong but enough to take what's needed.

Here's a shot of the rear taken from the cab, as well as led's there is a fluorescent over the cooker.

Image

The mains has been in for a while now, here is the 20A/12v power supply so I can easily run all the 12v stuff including cooler and laptop (via 12 to 19v converter) from mains when on hook up. You can see the consumer unit too.

Image

The centre console is in too...

Image

seriously gotta lose those arm rests...

Image

Just need to get a battery charger as the old one died, and fix things down a bit better and tidy a few wires. But, I might take everything out of the cab first in order to soundproof the floor now that I know the water leak is cured. Not sure whether to just put the old rubber matt down then cut a new carpet to go over it as I did with the old MK3 or perhaps use the sticky roof roll stuff. I like the idea of the later but worry that if the water ever leaks in again it will get underneath and be a lot more hassle to sort out than just taking out mats and carpets to dry. I digress...

Next we have the rear view camera for the sat nav. I mounted it like this rather than off the number plate fixings as recommended because this way you can see the edge of the bumper, so you know how close you are to something. The other way it would just show you getting closer and closer until CRUNCH! Plus it would prolly get splashed in muck that low down. I haven't really used it yet because I never have the sat nav with me - really need to get that permanently installed as it is far too much hassle bringing it out every time, what with the mount, the power lead etc etc.

Image

Here is the panel I made, that I had in the Mk3. I had to cut the left hand end off which had a clock. But the clock never kept time and I have one in the van now anyway :) It was a bit of a tricky fit what with that bit of plastic being curved, but it's good enough.

Image

Note that I have just aquired the third switch needed to complete that little row in the dash there too! None of the rear wash/wipe/heater stuff works yet though it is all there. The latest switch (squirter) though, I can't seem to find a plug for, but I definitely have a squirter on the rear screen...well I've seen a bottle and a pipe.

Here's a little compass I got from Maplin - the second one actually, as the first one faded and the magnets went weak and it didn't work anymore. I think this one's going the same way but I like it anyway - it lights up with the side lights, blue at the mo' but when I get around to redoing all the bulbs to leds everything will be red or white...one day.

Image

My electric mirror switches...still a few blanks to fill there boy... (what's that switch top right???)

Image

Well, I tinted the cab windows today - I used Light smoke which is 65% (or 35% depending on your view point!). It wasn't the cheap ebay stuff, nor was it the trilogy stuff (Savage/Defender) but a mid priced stuff of a decent quality. The cheap stuff is always really thick and not sticky enough. This did ok - and for the first time ever I didn't take the windows out to apply it. It is so much easier to work without contamination etc when you have the window in question on the kitchen drainer, but I did ok with them in situ. I didn't want to cut to the size of the inner window gasket so I took the seals off so I could tint right to the edges of the glass. When it's cured I'll go round with nail varnish to stick the edges, then refit the seals. It came out well aside from one gust of wind taking me by surprise...oh and toward the end of the roll the stuff was all creased so I couldn't do the last little side window. Speaking to the suppliers about that - though it could have been squashed in the post. Should have checked it all first really but the first bit looked ok and I didn't want to unroll/handle it too much and get creases and dust on it before I even started.

The quarter glass is not tinted yet, the main glass is...

Image

The light smoke is strange - when I got it I thought it would be too dark, but then I remembered the large cab windows on the Transit always let a lot of light in. In fact it looks too light sometimes. I'm pretty happy with it overall and although it "may" not meet legal requirements I don't think it will attract a pull from plod particularly.

See it looks really dark like this...

Image

Anyway - that's all for now. I will be pestering you all for advice on how to get the rear wash/wipe/heated screen going no doubt - and of course I am embarking on a custom bumper FibreSport stylee.
Oh yeh...and time to do those little bits of rust soon :(
"There's always a way"
johny transit
User avatar
johny transit
Transit Devotee
Transit Devotee
 
Posts: 729
Joined: Wed Apr 23, 2008 7:33 pm
Location: North London

Re: Johny Transits Mk5 Transit - Camper/Day #2

Postby johny transit » Fri Jun 10, 2011 1:13 pm

I've been having a go at the body work lately - both front arches were a bit scabby, so I took the angle grinder to them. Here's the o/s...

Image

The sections nearest the doors turned out to be fairly bad and could have done with replacing really, but I had made no arrangements to do this, so for now decided to repair them best I could.

Image

Jenolite was used, then red oxide primer...

Image

A good spread of filler to cover marks from the grinder (and fill the holes!)...

Image

Then after grey primer and going through the various finer grade papers, I applied a couple of coats of paint from a specially ordered rattle can. I must say, this was the best paint I have used in ages (not that I do this kind of thing very often) and the colour match was spot on.

Image

Image

I simply gave the supplier (Auto paint St Helens) the paint code and name. Maybe I was lucky but as it worked out so well I have ordered another three cans to do the bumpers etc.
I know some of you will be saying it's just a bodge, but I can't weld, and wanted to see how bad things were anyway. Also, as I now don't have any water leaking into the engine bay, perhaps things won't rot out from behind. That said, I'm under no illusions but hey if it lasts 18 months at least next time I'll know it needs replacing with panels - and 18 months is a long time in the life of a Transit :)

Here's the n/s before... (Ouch!)...

Image

And after...

Image

I also ground down the bottom edge of the sills...

Image

And the bottom inner edge needed a bit of work where the underseal had started to lift...

Image

One good thing, behind the mud flaps was good on both sides, so once I have cleaned them up and done another coat or two of underseal behind, they can go back on.

While I was underneath I spotted quite a few areas that need brushing down and redoing before winter, so I've ordered another tin of red oxide primer and a big tin of underseal. Plus, I will be taking the battery trays off and investigating the state of the shock absorber mounts. While the weather is good...
"There's always a way"
johny transit
User avatar
johny transit
Transit Devotee
Transit Devotee
 
Posts: 729
Joined: Wed Apr 23, 2008 7:33 pm
Location: North London

Re: Johny Transits Mk5 Transit - Camper/Day #2

Postby AeroNautiCal » Sat Jun 11, 2011 9:01 pm

Nice van with well thought out fitments and upgrades! Image

Those arches came out really well too.

Great work!
AeroNautiCal
Transit Aficionado
Transit Aficionado
 
Posts: 111
Joined: Mon Nov 10, 2008 5:14 am

Next

Return to Members Transit's - Progress Reports!


Who is online

Users browsing this forum: No registered users

This site contains affiliate links for which we may be compensated.